


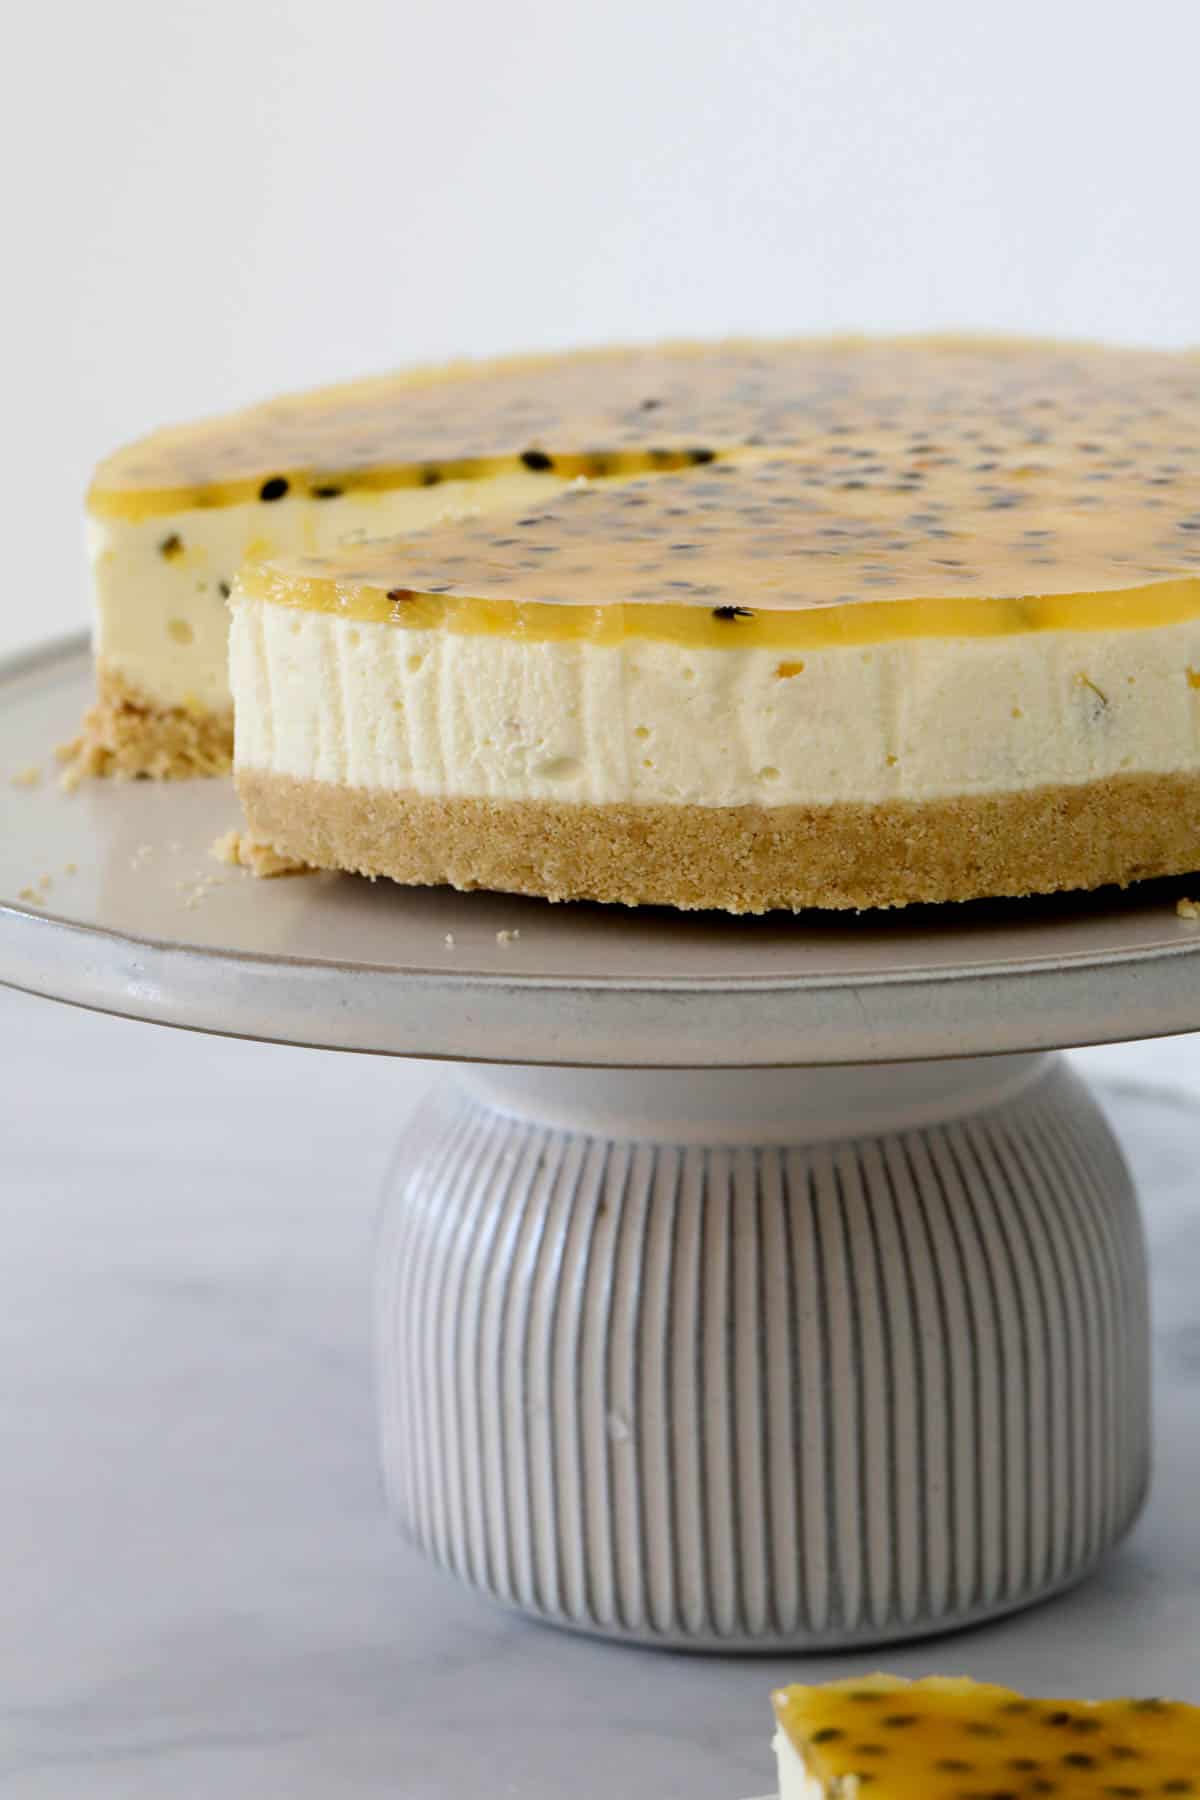
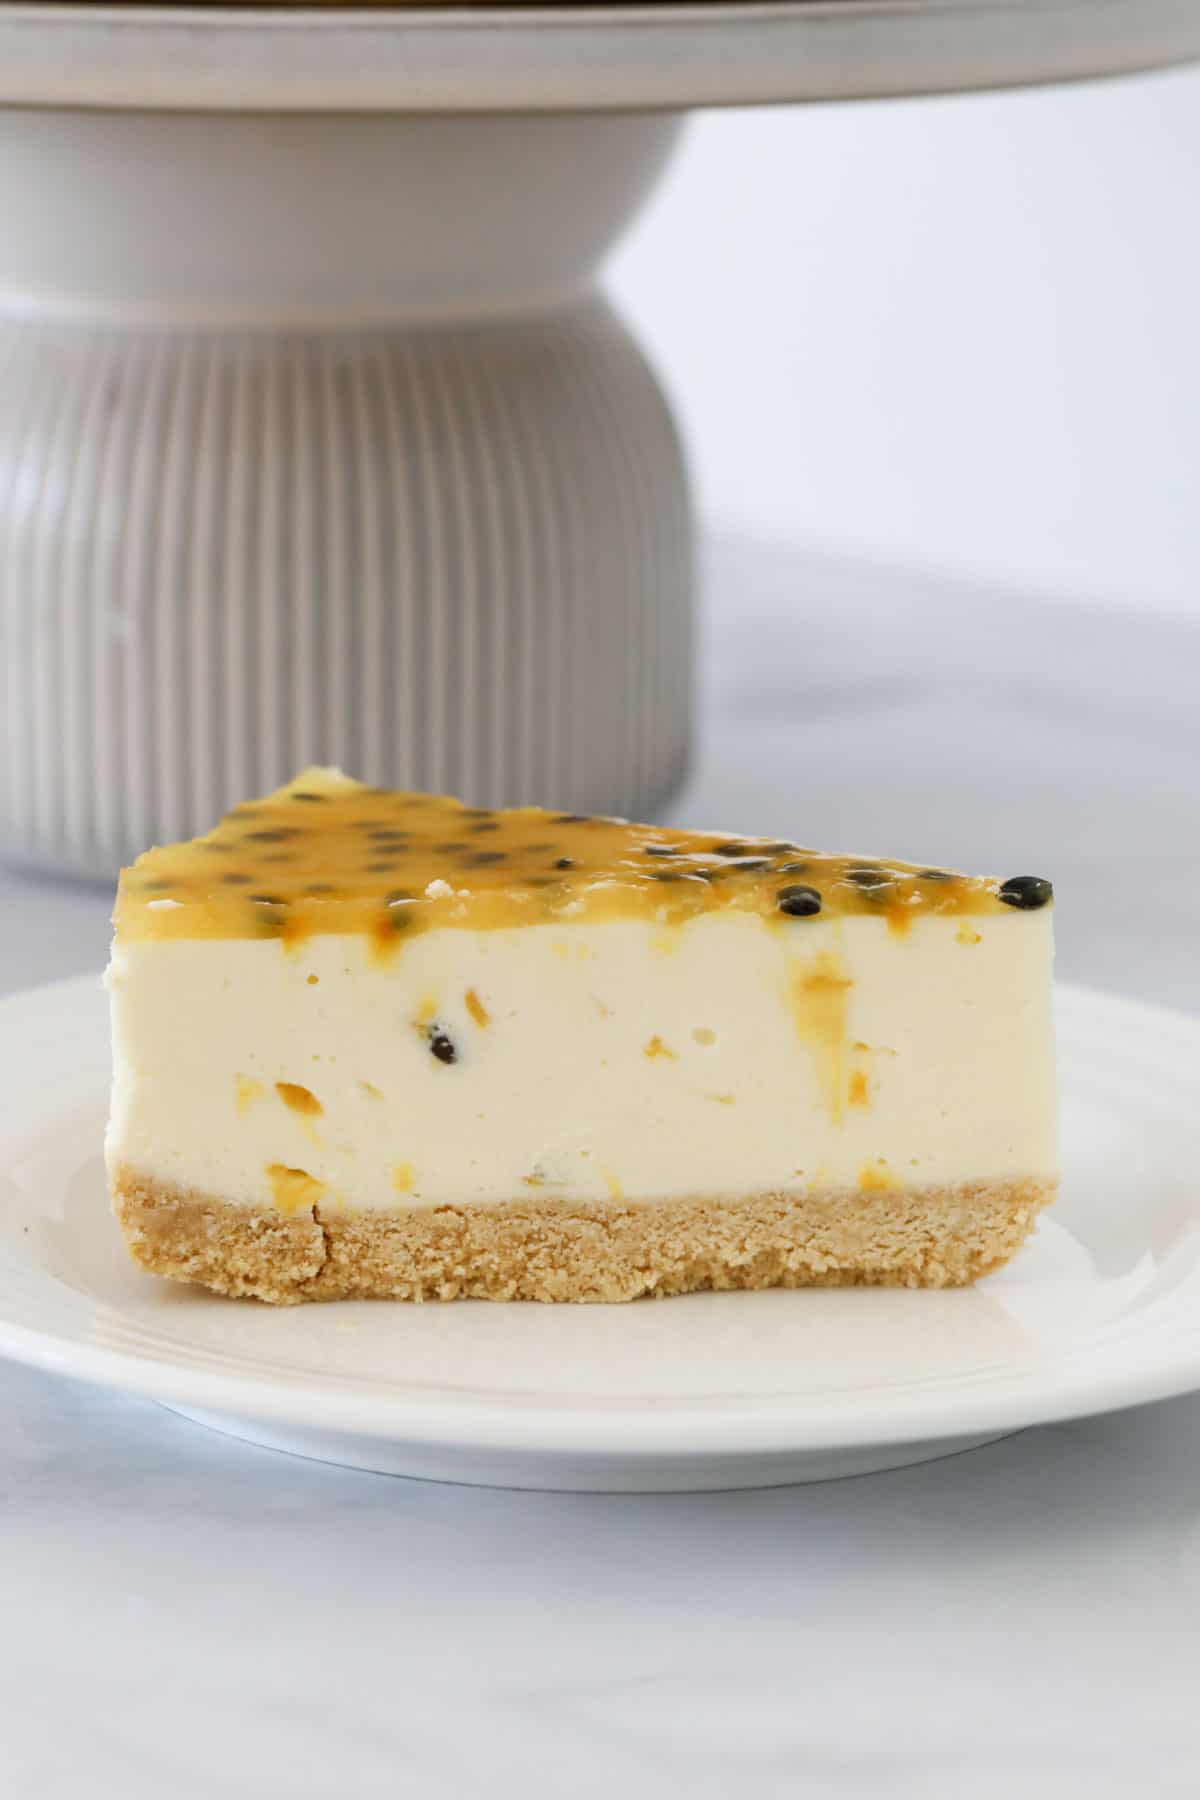
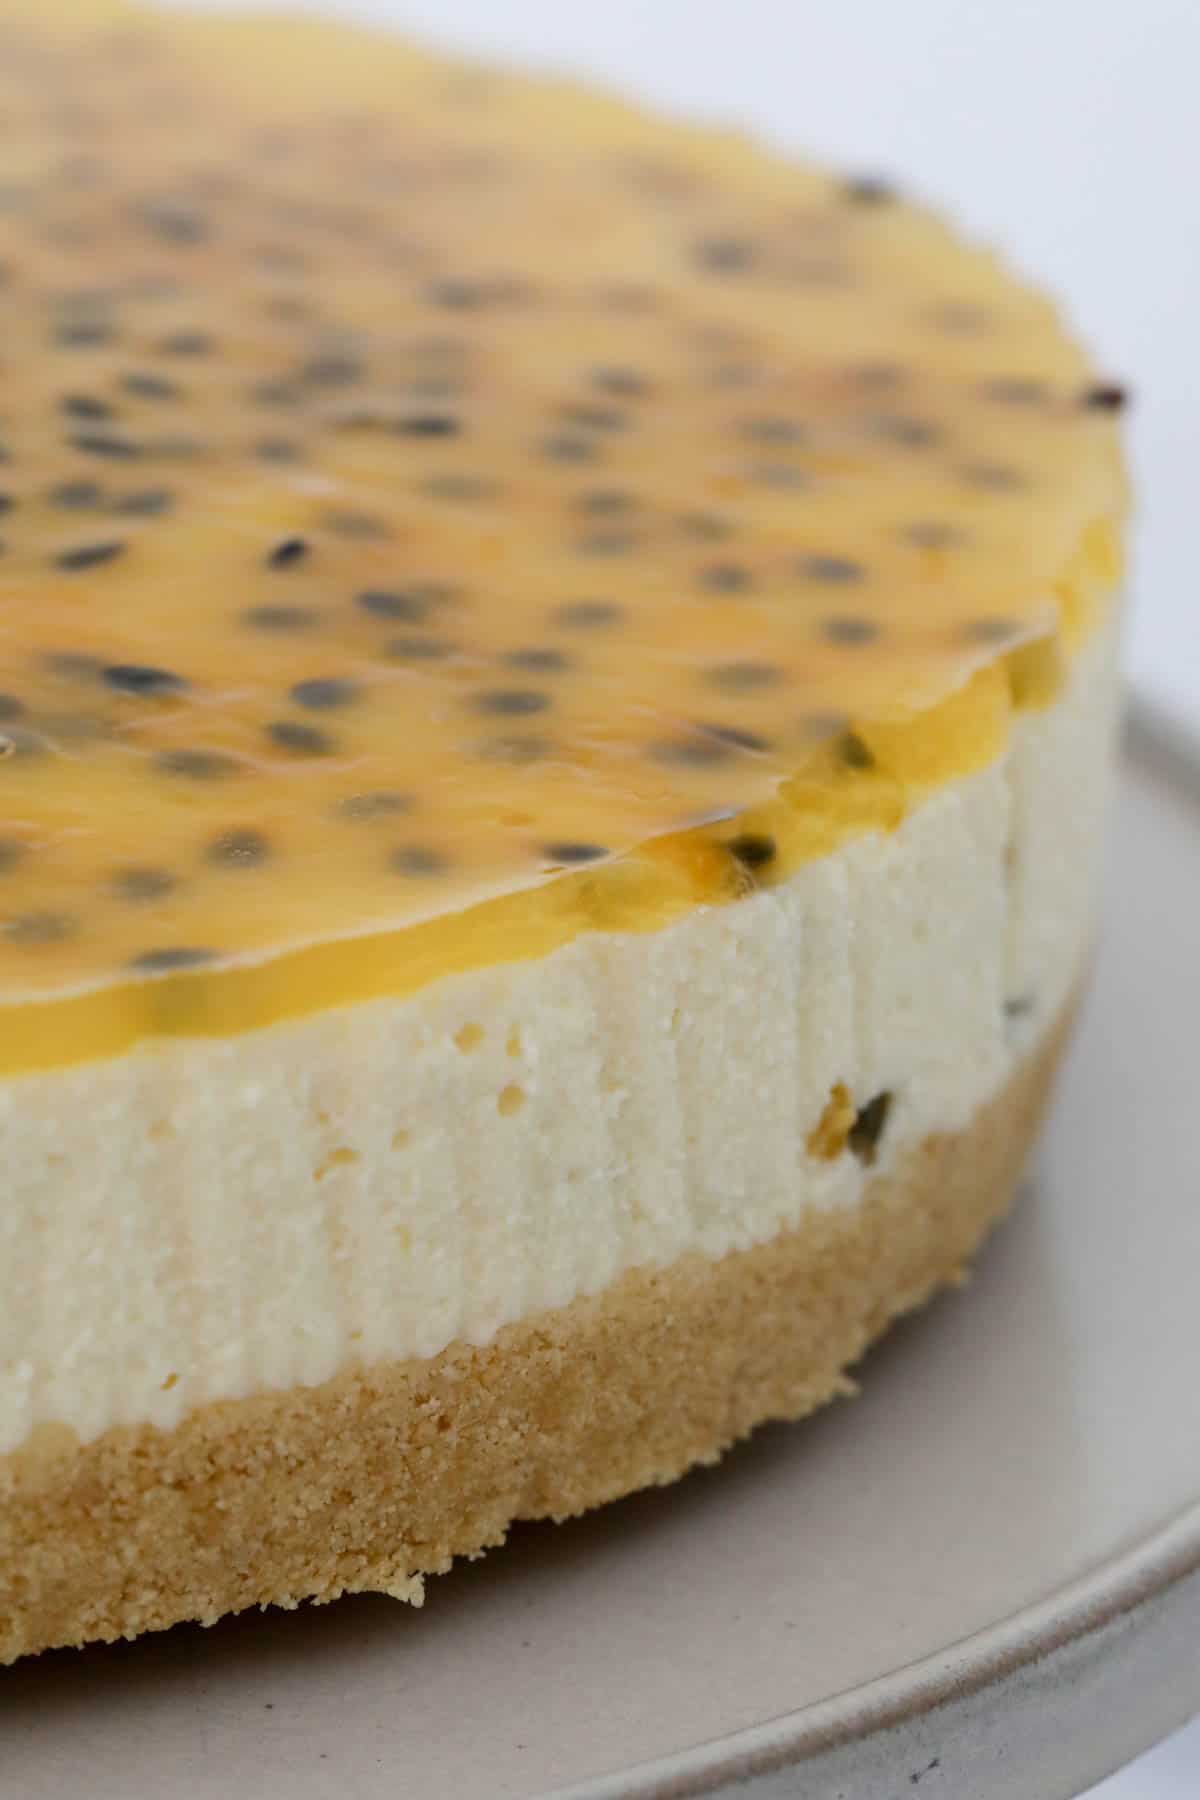
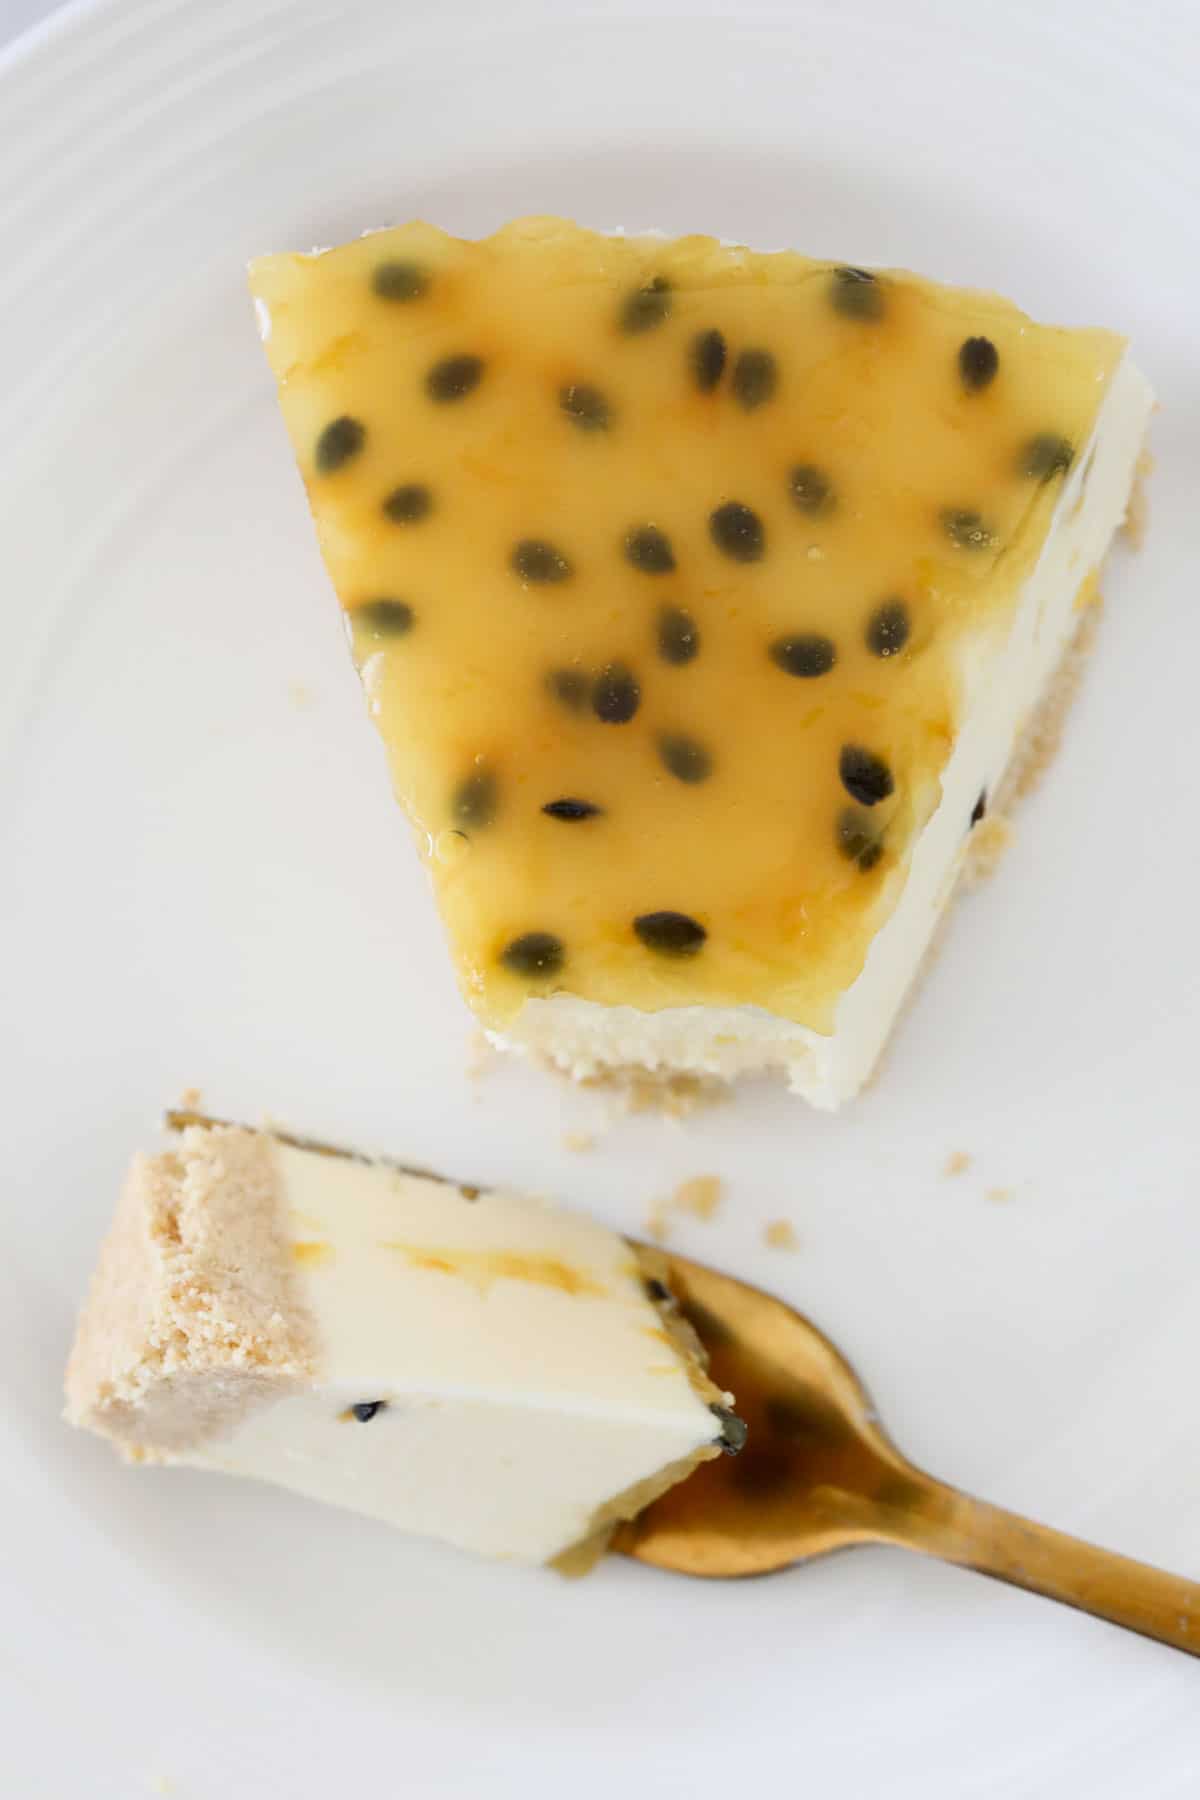
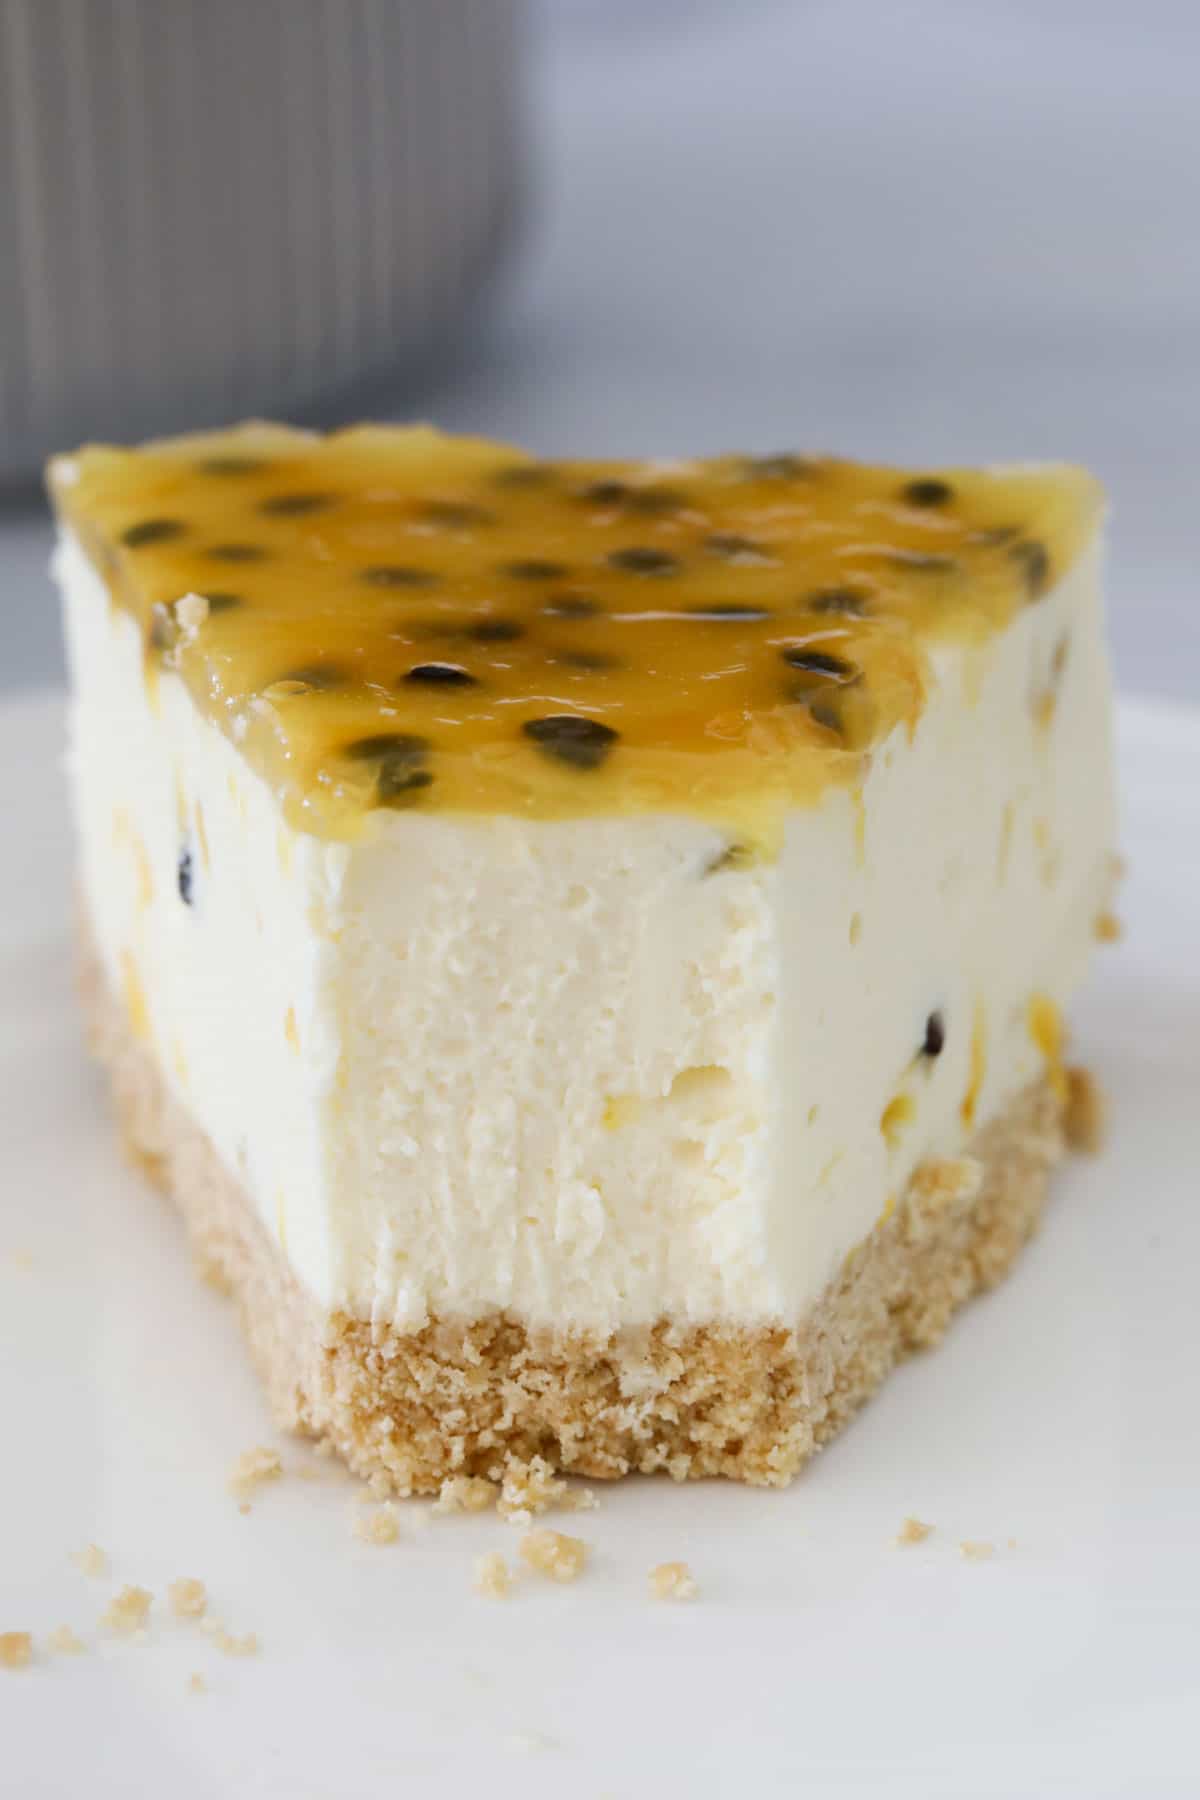
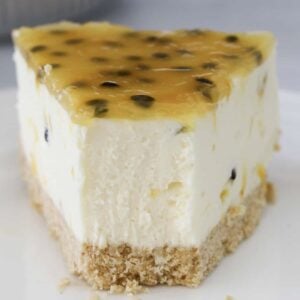
This no-bake passionfruit cheesecake with a crunchy biscuit base, creamy passionfruit cheesecake layer and passionfruit jelly topping is the easiest summer dessert!
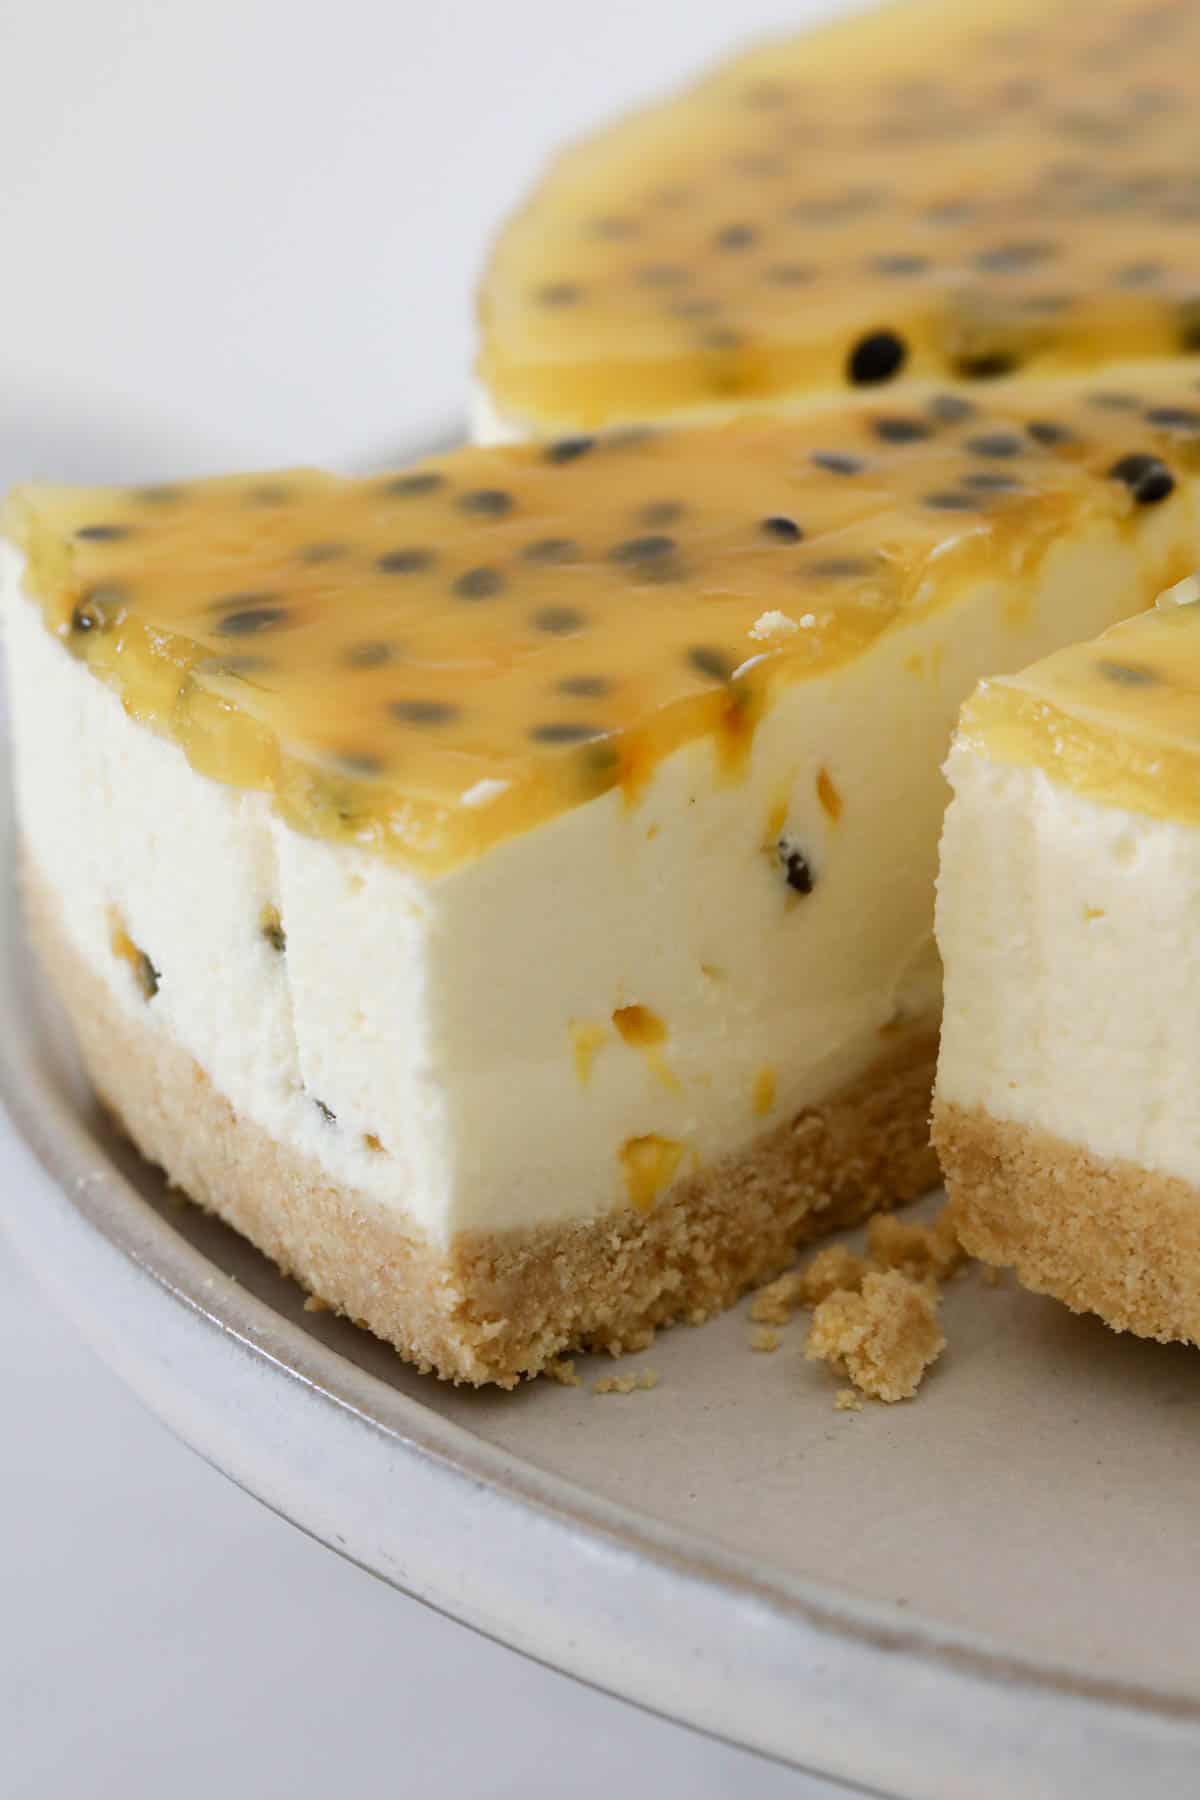
Rich and creamy, with bursts of tangy passionfruit throughout, this luscious passionfruit cheesecake is one of my favourite summer desserts!
Whilst I am a HUGE cheesecake fan and baked cheesecakes have a special place in my heart, there is something about no bake cheesecakes for their ease that often makes them my go-to dessert for entertaining. Like my mango cheesecake, blueberry cheesecake, lemon cheesecake and chocolate cheesecake, this passionfruit cheesecake is a real crowd pleaser and there is no cooking required!
Serve this fruity cheesecake at parties, BBQs, Christmas or other summer celebrations alongside other popular passionfruit recipes like this passionfruit mango pavlova and passionfruit slice. A taste of summer in every bite!
Why You’re Going To Love This Recipe
- No bake – there is no need to turn the oven on to make this recipe! Just mix, chill and serve!
- Great for parties – a cheesecake is always a popular desert, with young and old alike.
- Make ahead – this passionfruit cheesecake requires at least 4 hours chilling time in the fridge before serving, making it a great option for making ahead of time!
- Celebration dessert – this cheesecake looks impressive but is SO easy to make!
- Conventional and Thermomix – both methods are written in the recipe card at the end of the post.
What You Need
No bake passionfruit cheesecake is made from just a handful of easy to find ingredients.
Note: Scroll to the recipe card at the bottom for the ingredients quantities and full detailed method.
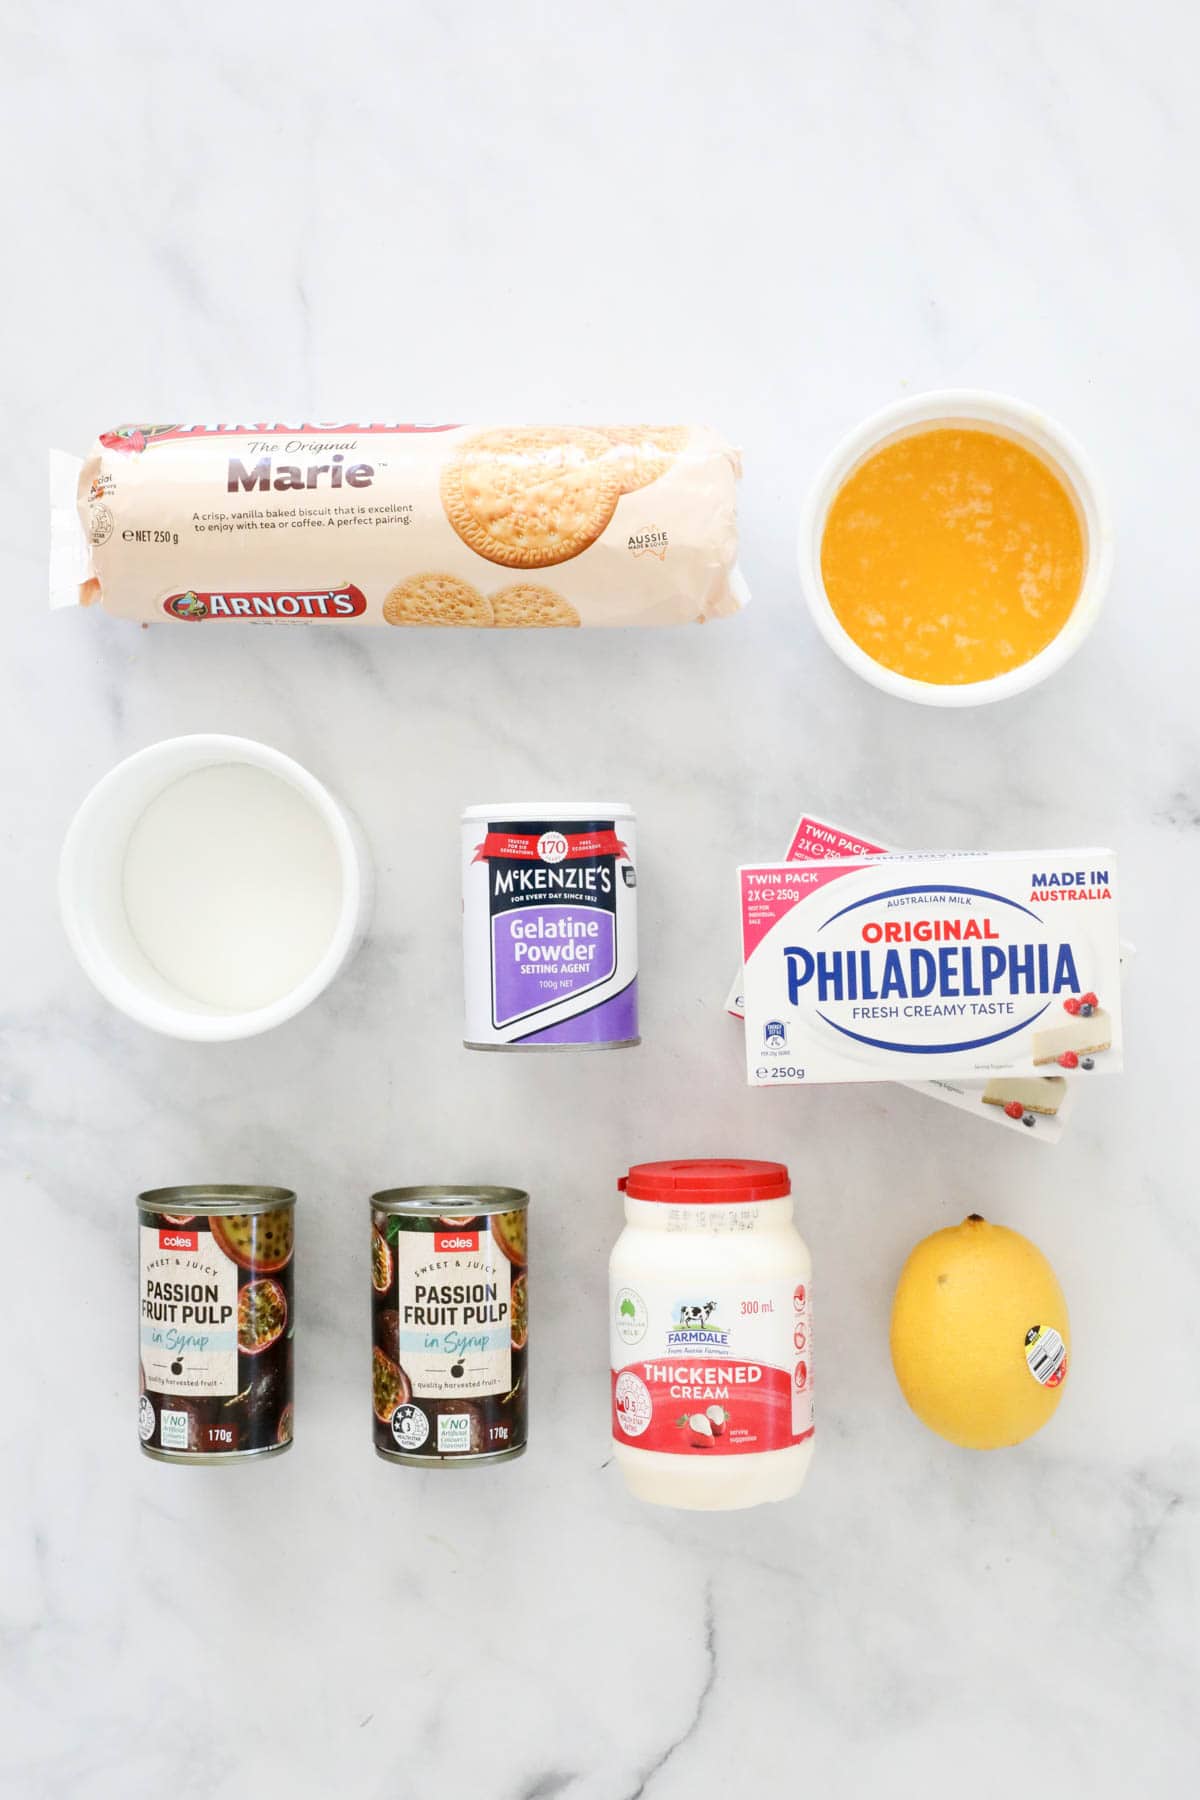
- Biscuits – Arnotts Marie or any other type of plain sweet biscuits.
- Butter – either salted butter or unsalted butter is fine to use in this recipe.
- Gelatine powder – dissolved in ⅓ cup boiling water.
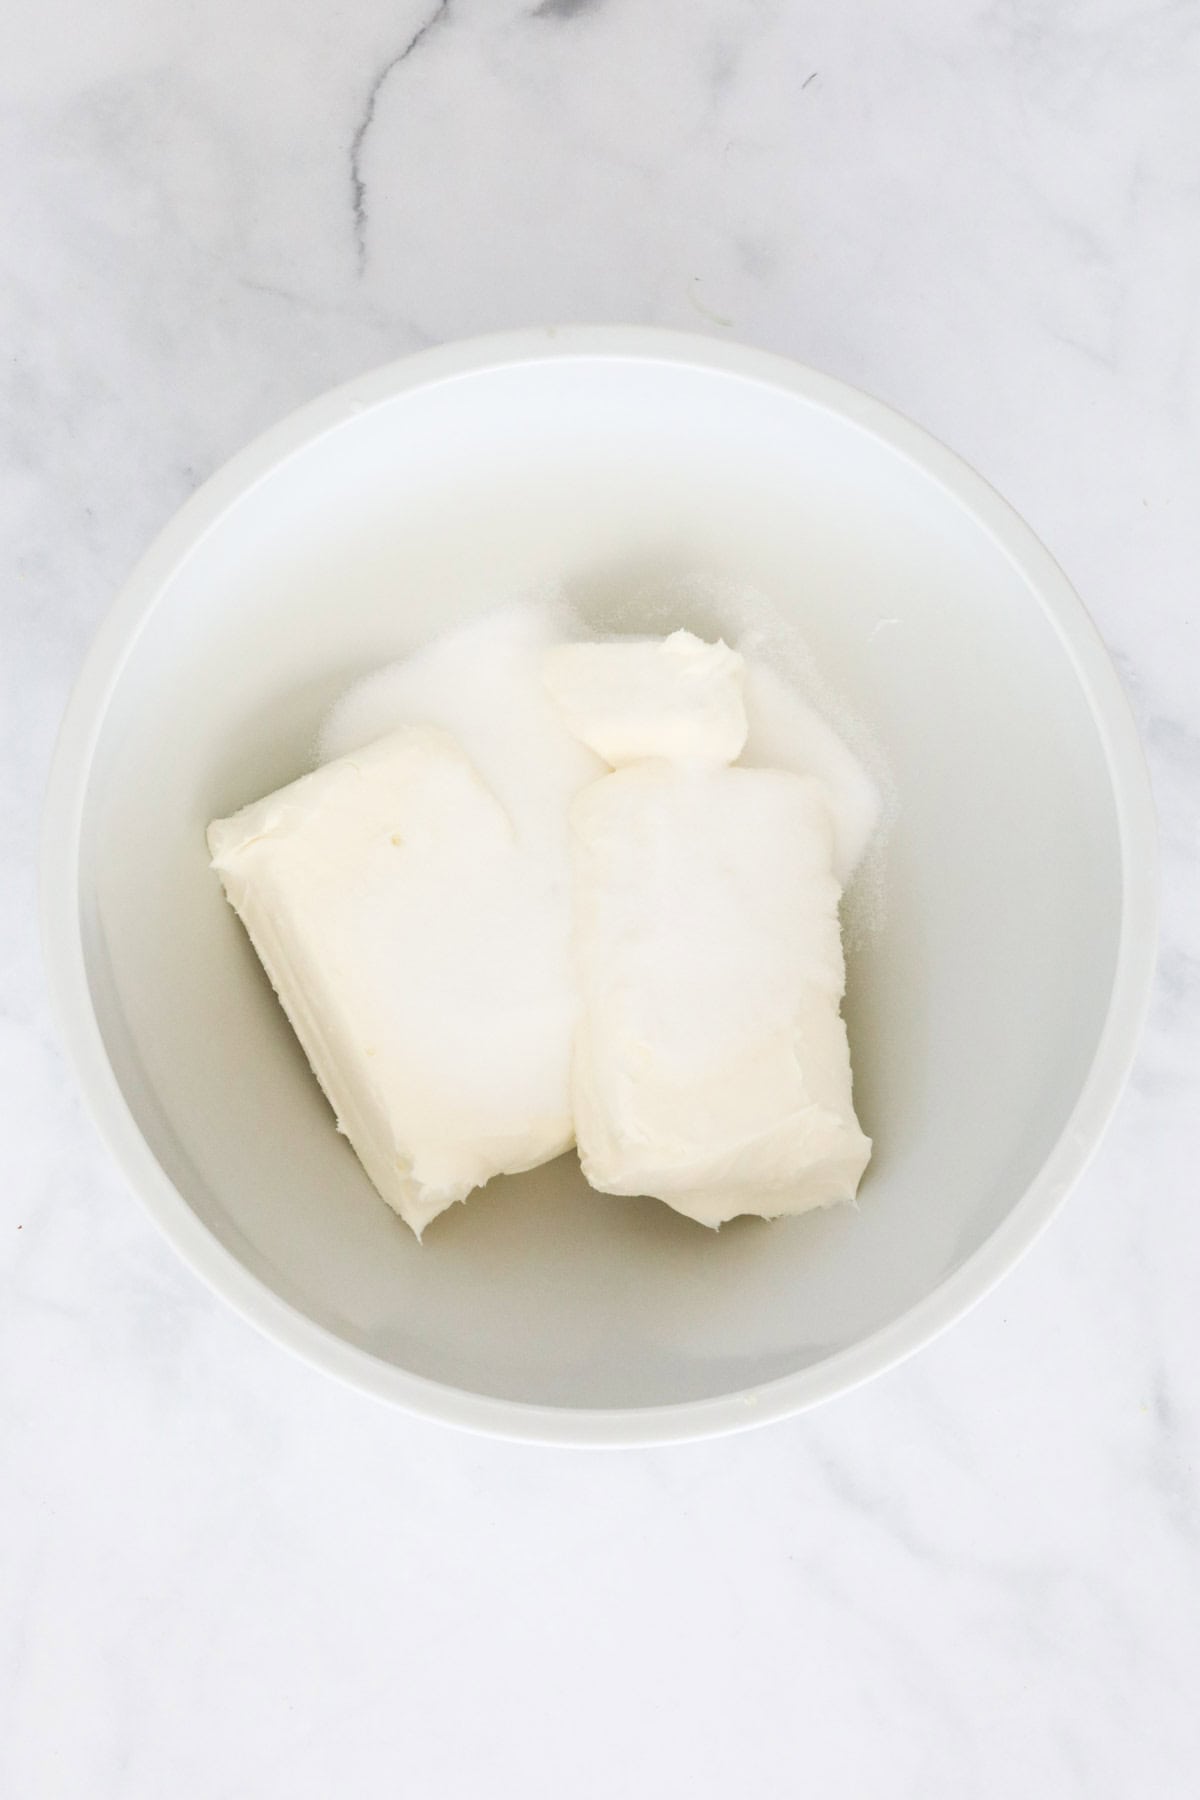
- Cream cheese – I recommend using full fat cream cheese for the best flavour and texture. Philly block cream cheese is my favourite. Make sure to bring it to room temperature before using.
- Caster sugar – also known as superfine sugar. This fine sugar dissolves easily when whipped with the cream cheese.
- Cream – choose a cream that is suitable for whipping, like thickened cream, heavy cream or whipping cream.
- Lemon juice – I recommend using fresh lemon juice for the best flavour.
- Passionfruit pulp – you can use canned passionfruit pulp or fresh passionfruit pulp.
Equipment Required
You don’t need any fancy equipment to make this cheesecake with passionfruit, just:
- 23cm round springform tin – lined with baking paper.
- Food processor – for crushing the biscuits.
- Large bowl – for mixing the cheesecake in.
- Hand-held beaters, stand mixer or Thermomix.
- And a fridge, of course!
Step By Step Instructions
This no-bake passionfruit cheesecake recipe takes just 30 minutes to prepare, and has no complicated steps, however everyone may think you spent hours in the kitchen!
Note: Scroll to the recipe card at the bottom for the ingredients quantities and full detailed method.
Step 1 – Prepare The Cheesecake Base
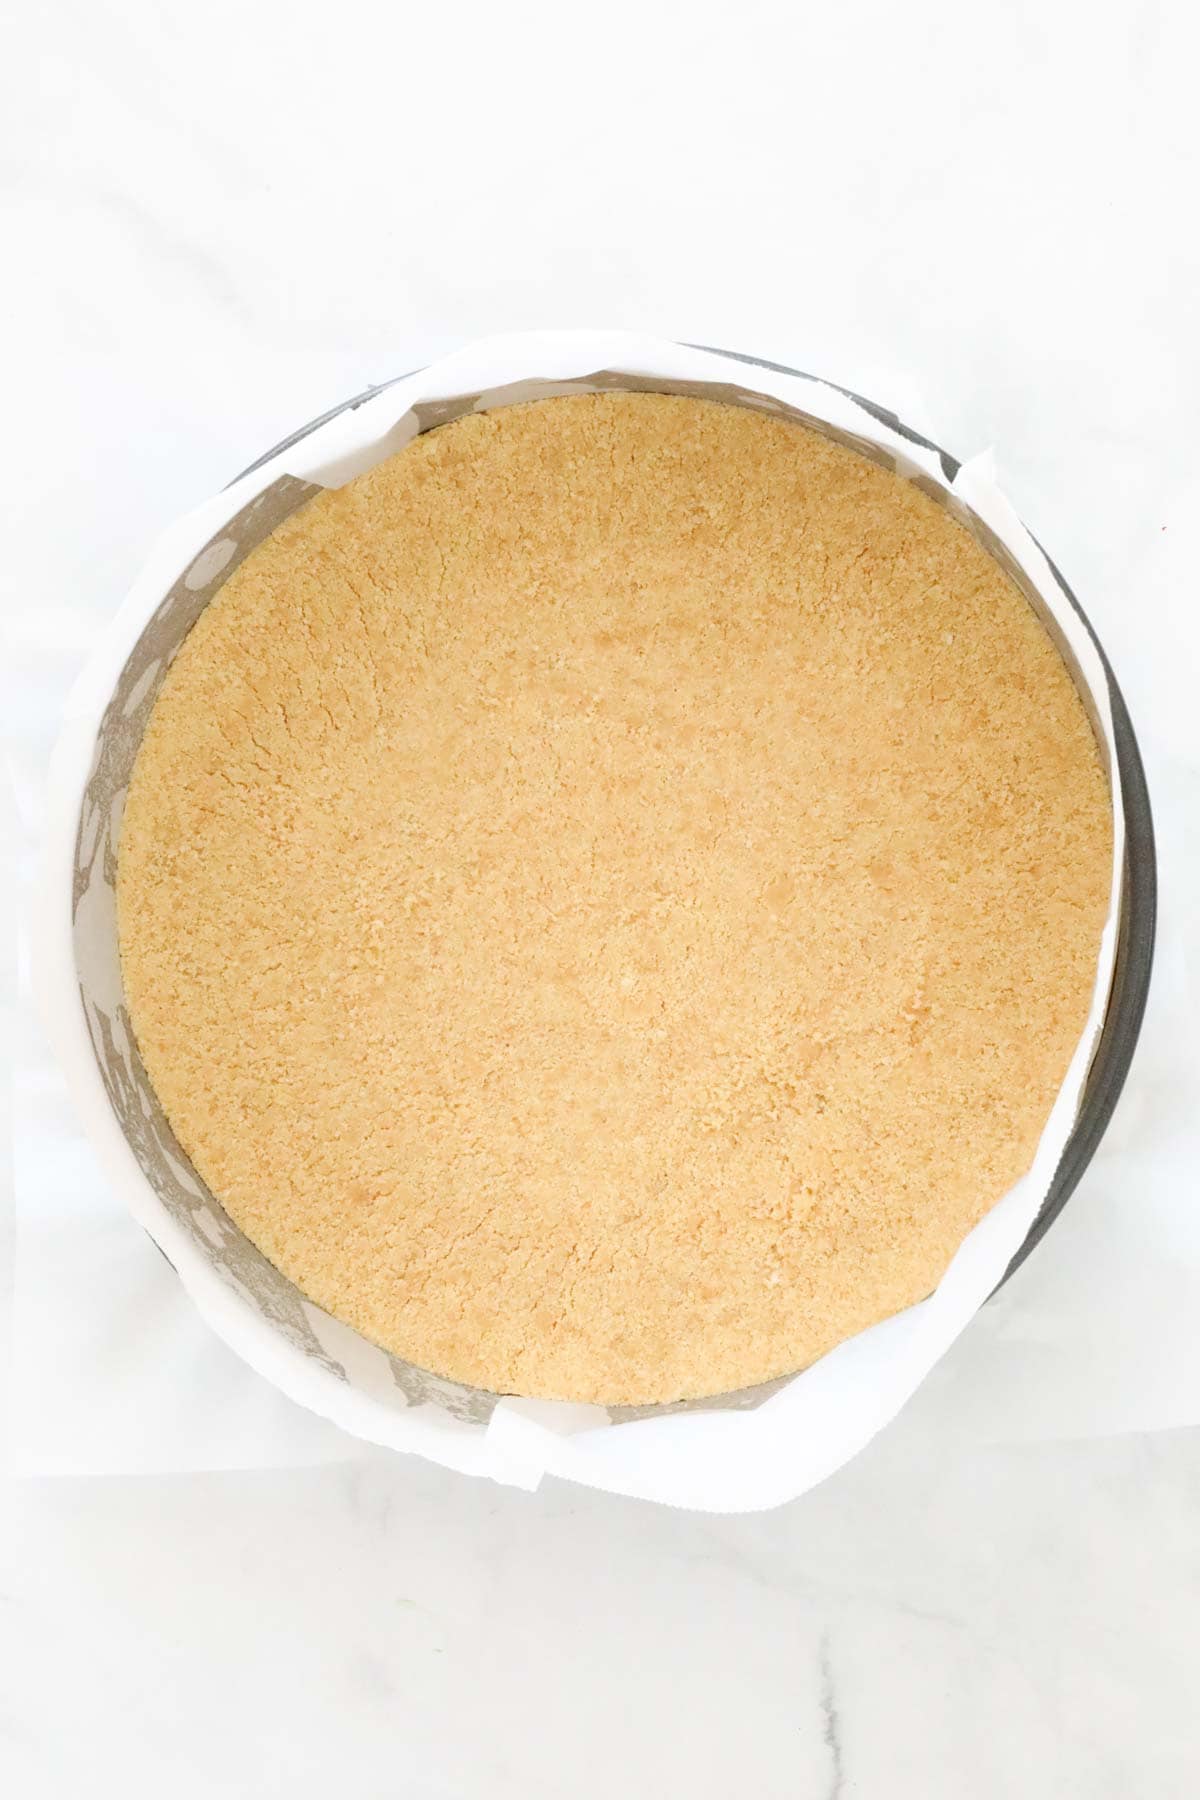
Firstly, grease and line your tin, and set it aside.
Crush the biscuits in a food processor and place into a bowl. Pour in the melted butter and mix until well combined.
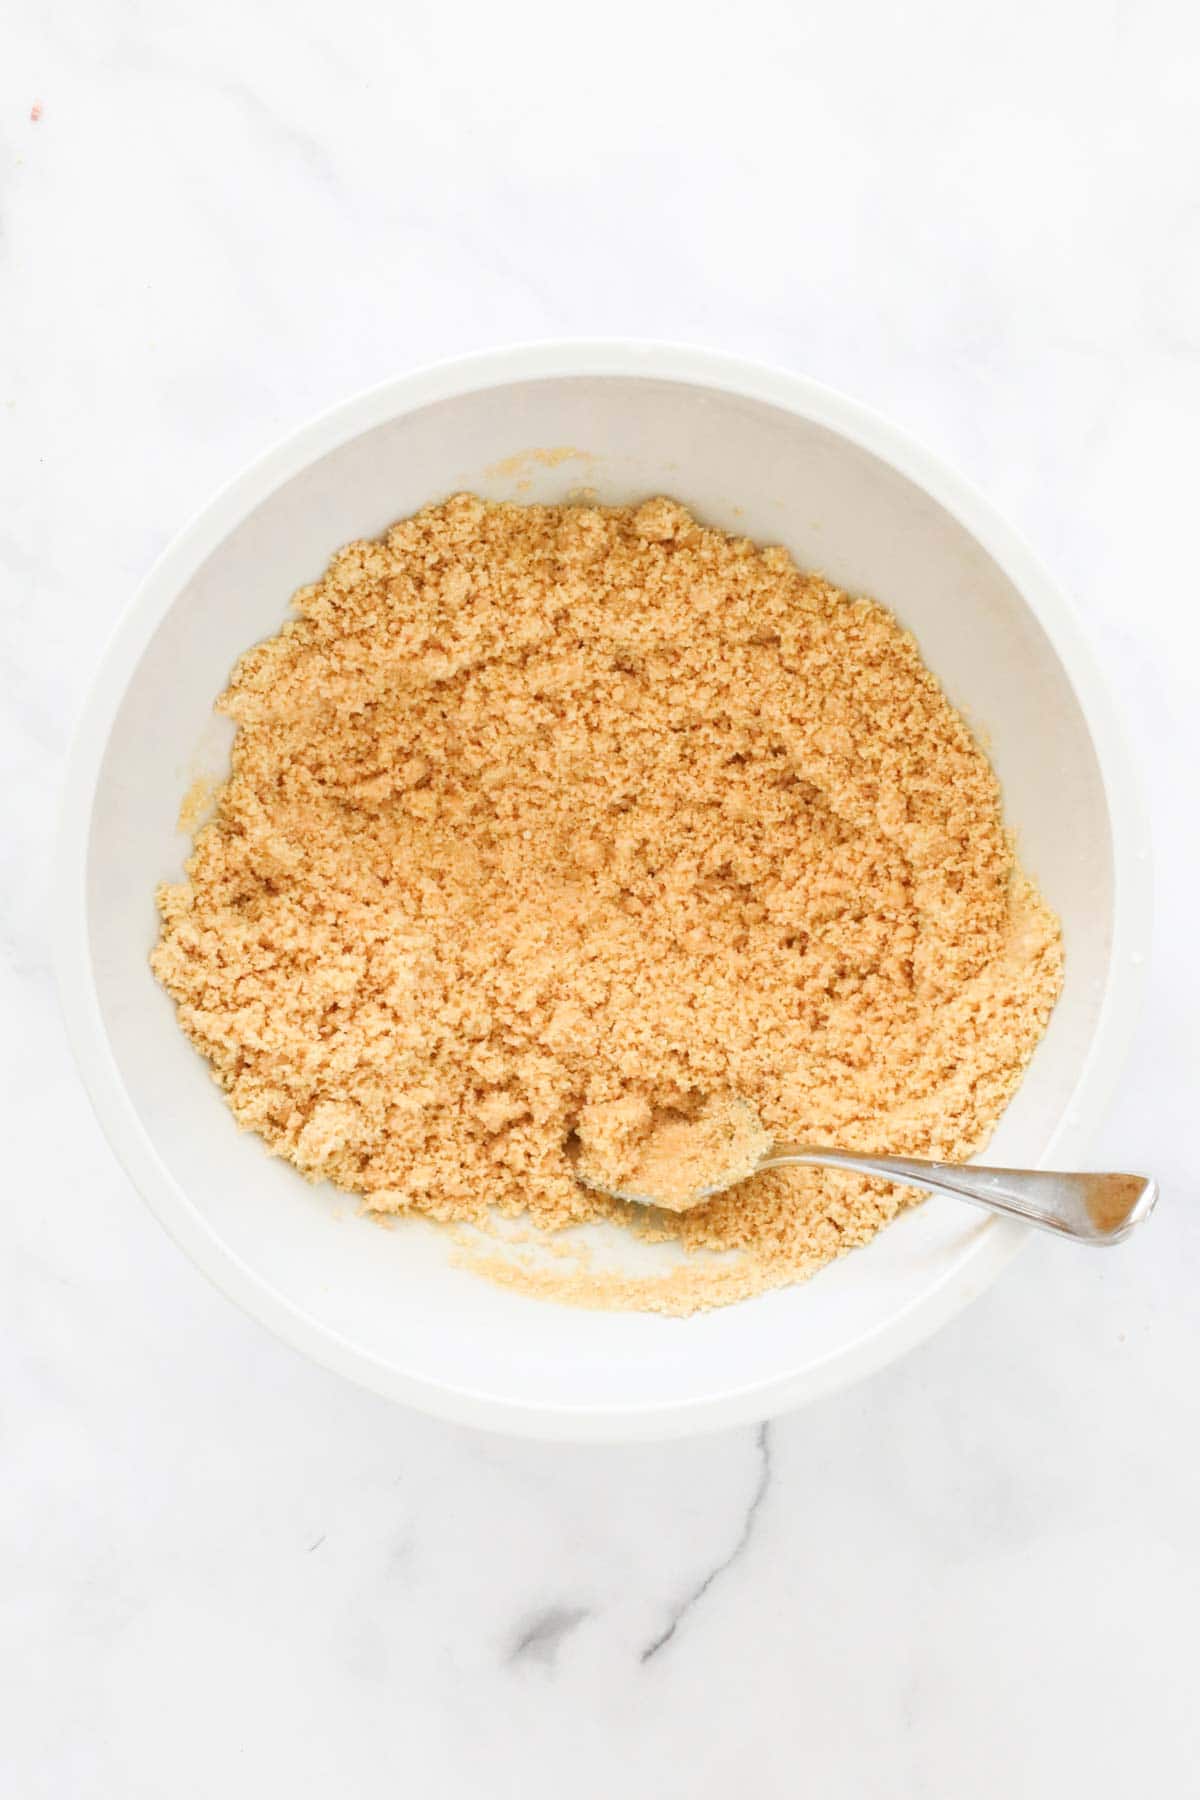
Spread the crumb mixture into the base of the prepared tin, press down firmly, and place it into the fridge.
Step 2 – Dissolve The Gelatine
Place boiling water into a small bowl and sprinkle over the gelatine powder. Whisk quickly with a fork to dissolve the gelatine. Set this aside to cool slightly.
Step 3 – Make The Cheesecake Filling
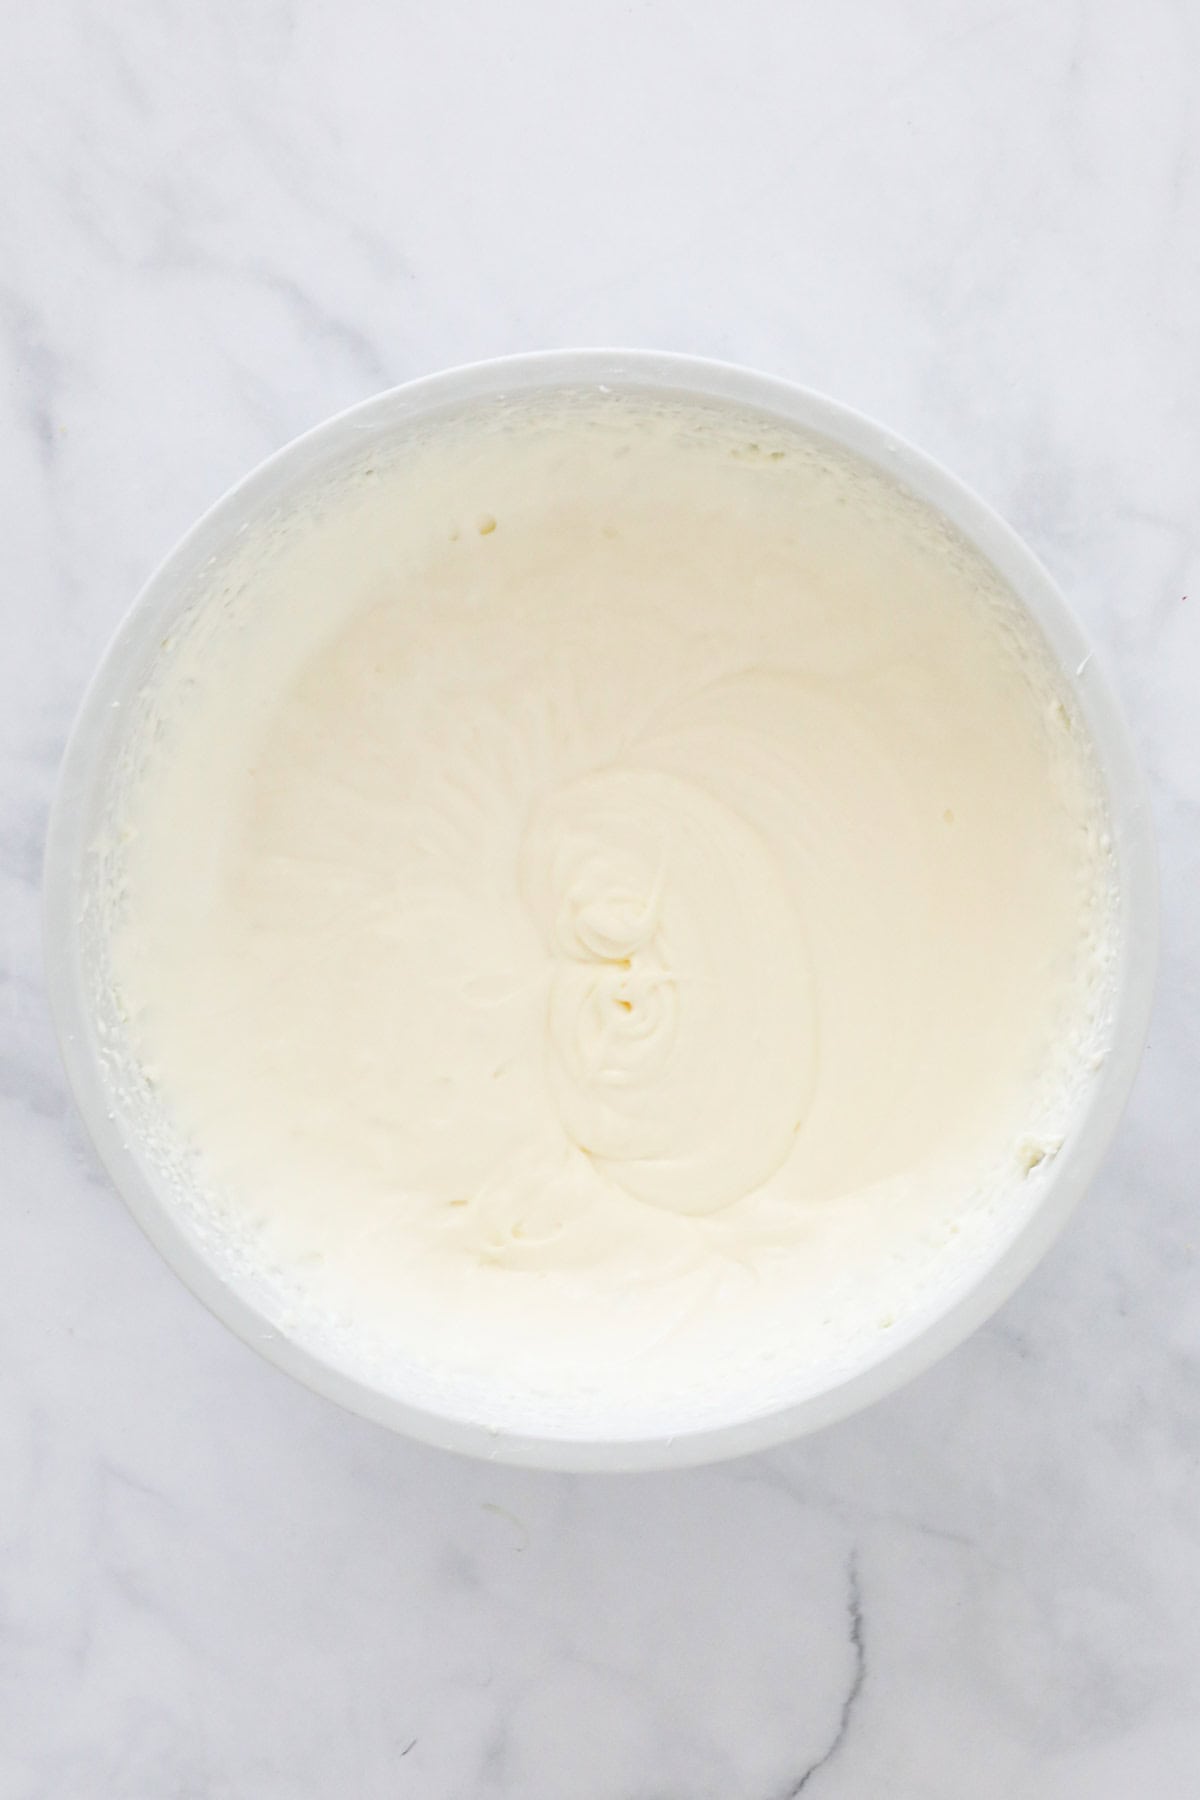
Add the softened cream cheese and caster sugar to a large bowl.
Use hand-held beaters or a stand mixer to beat the cream cheese and caster sugar until smooth and creamy.

Add the dissolved gelatine that has cooled slightly, and beat this through the cream cheese mixture.
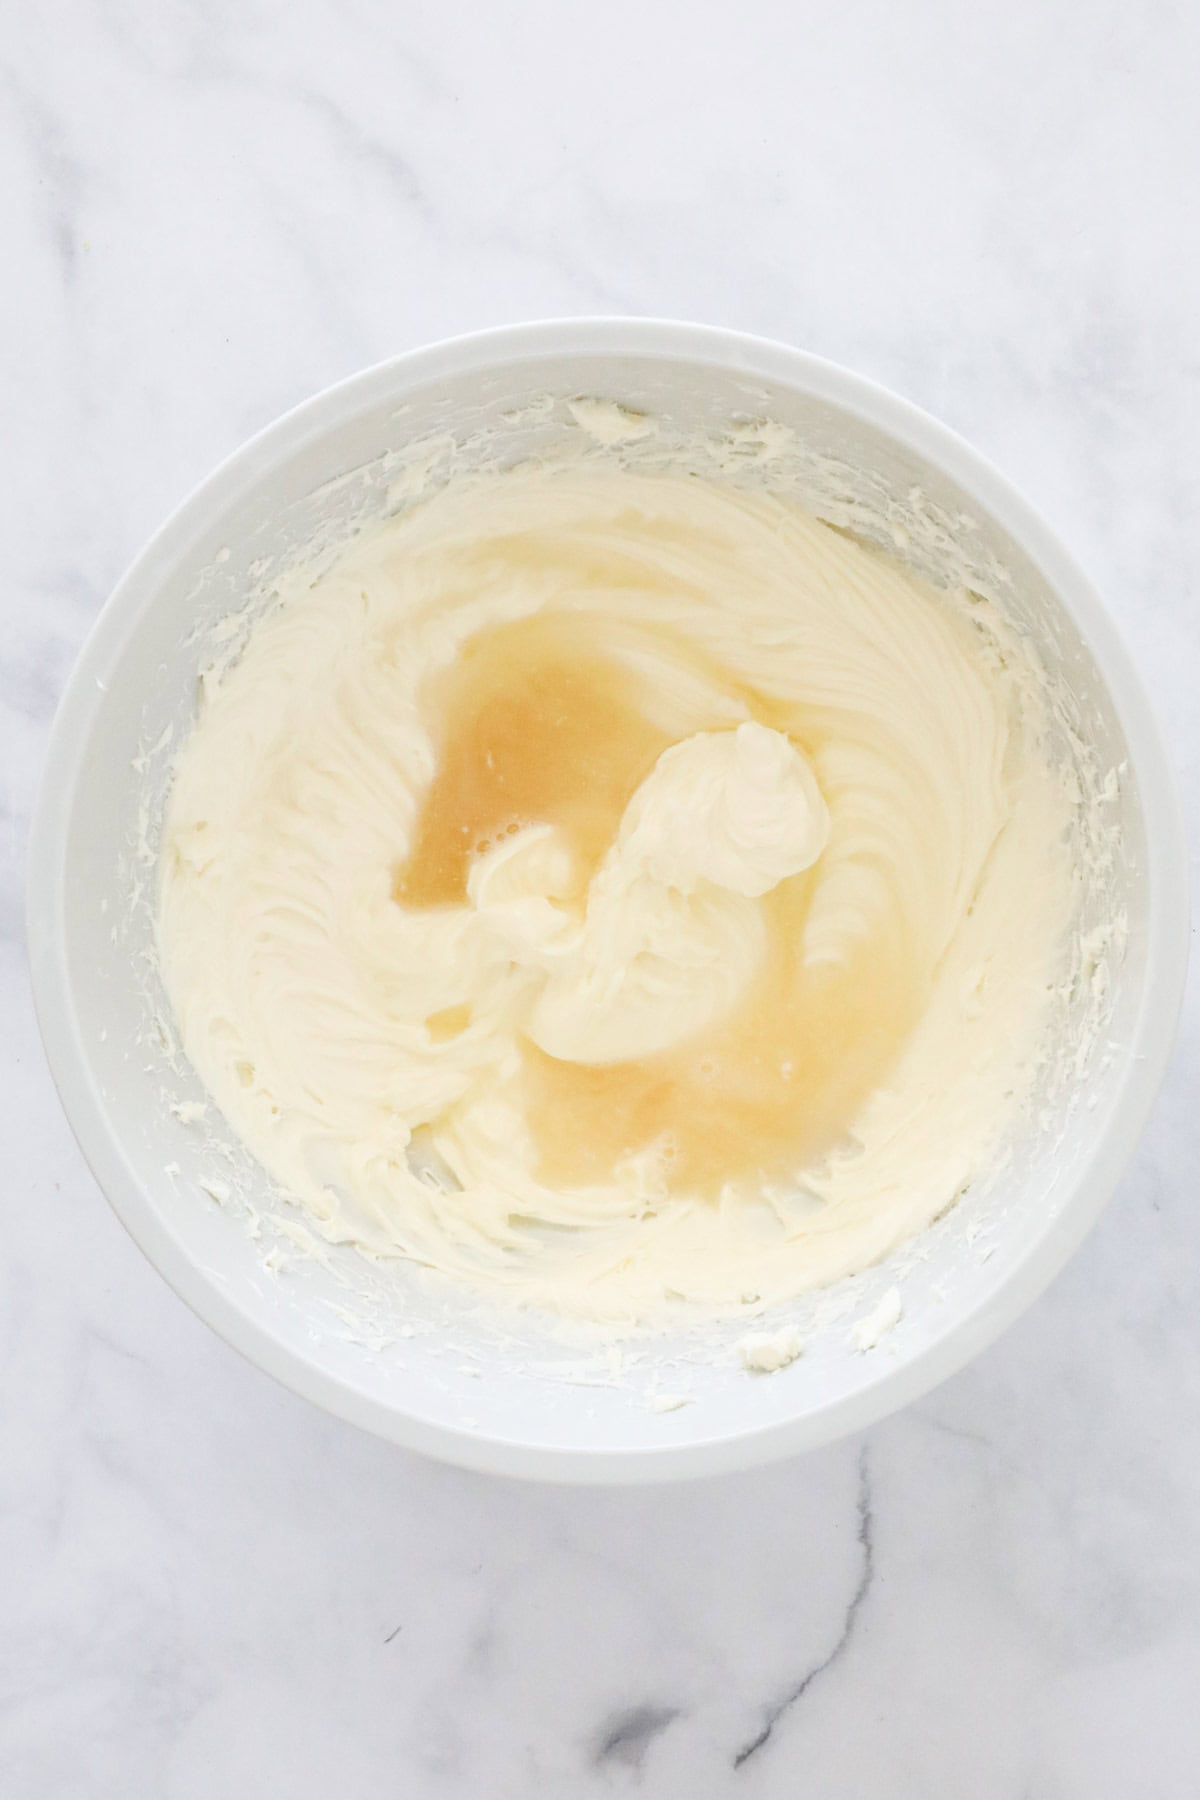
Add the cream and lemon juice and beat until slightly thickened.
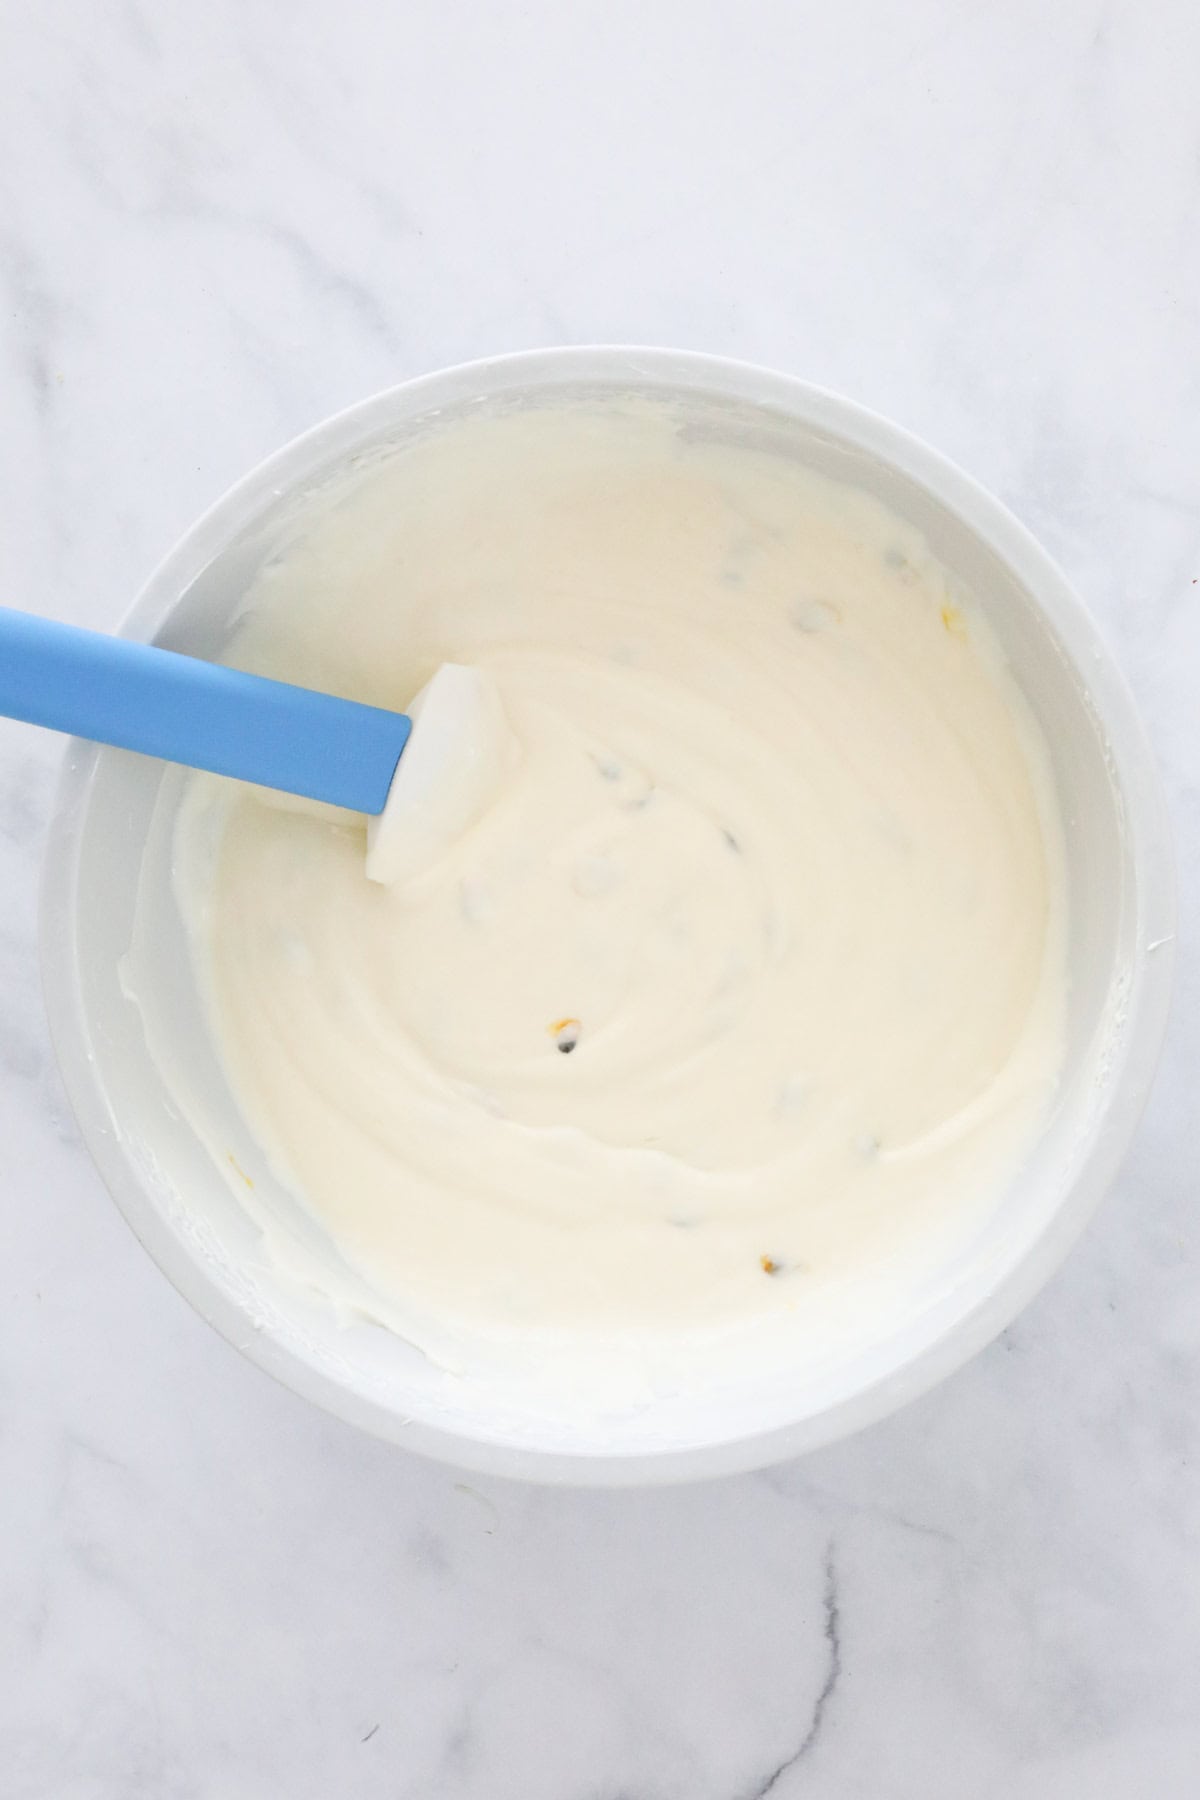
Add the passionfruit pulp.
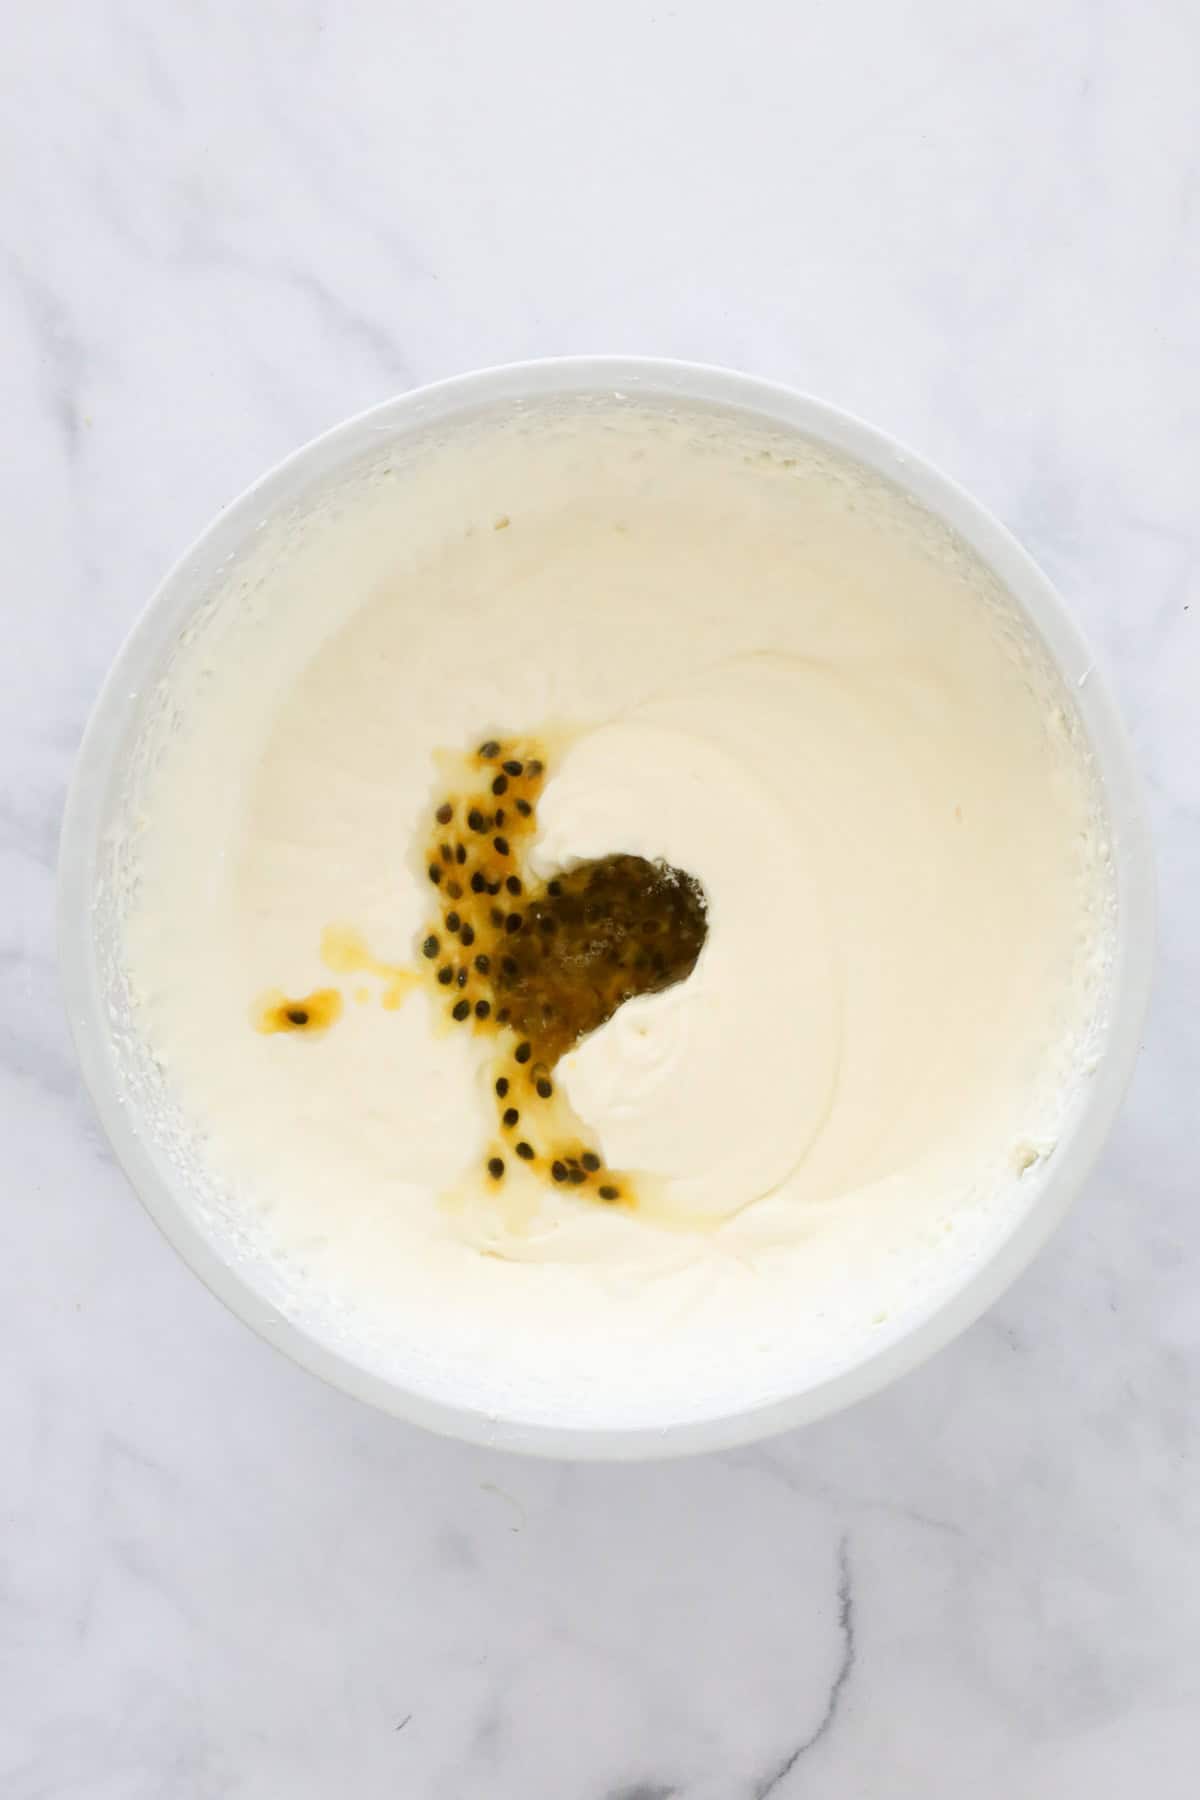
Stir until the pulp is combined.
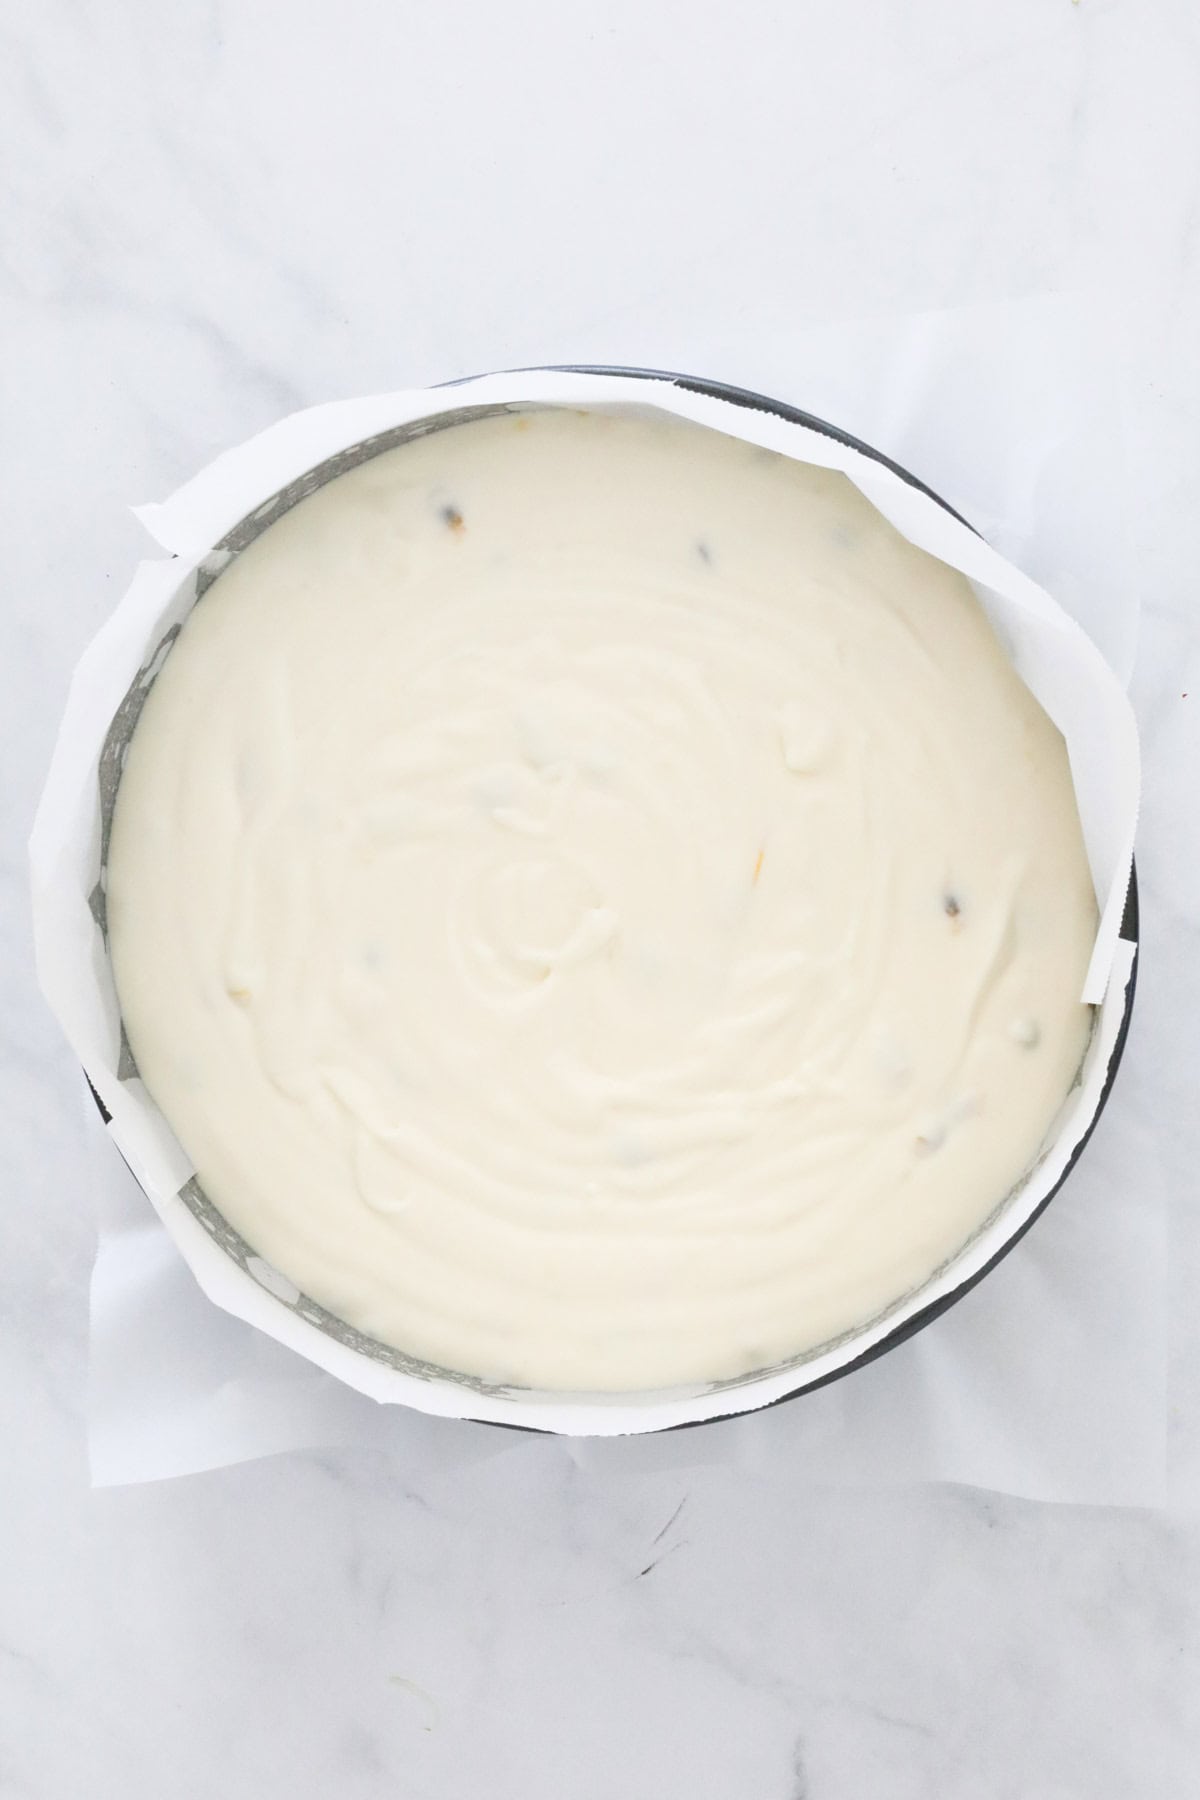
Step 4 – Chill
Pour the mixture over the prepared base and place cheesecake into the fridge until firm (1-2 hours), before adding the passionfruit jelly layer.
Step 5 – Prepare The Passionfruit Jelly
Dissolve the gelatine in boiling water, cool slightly.
Mix the extra passionfruit pulp through the dissolved gelatine.
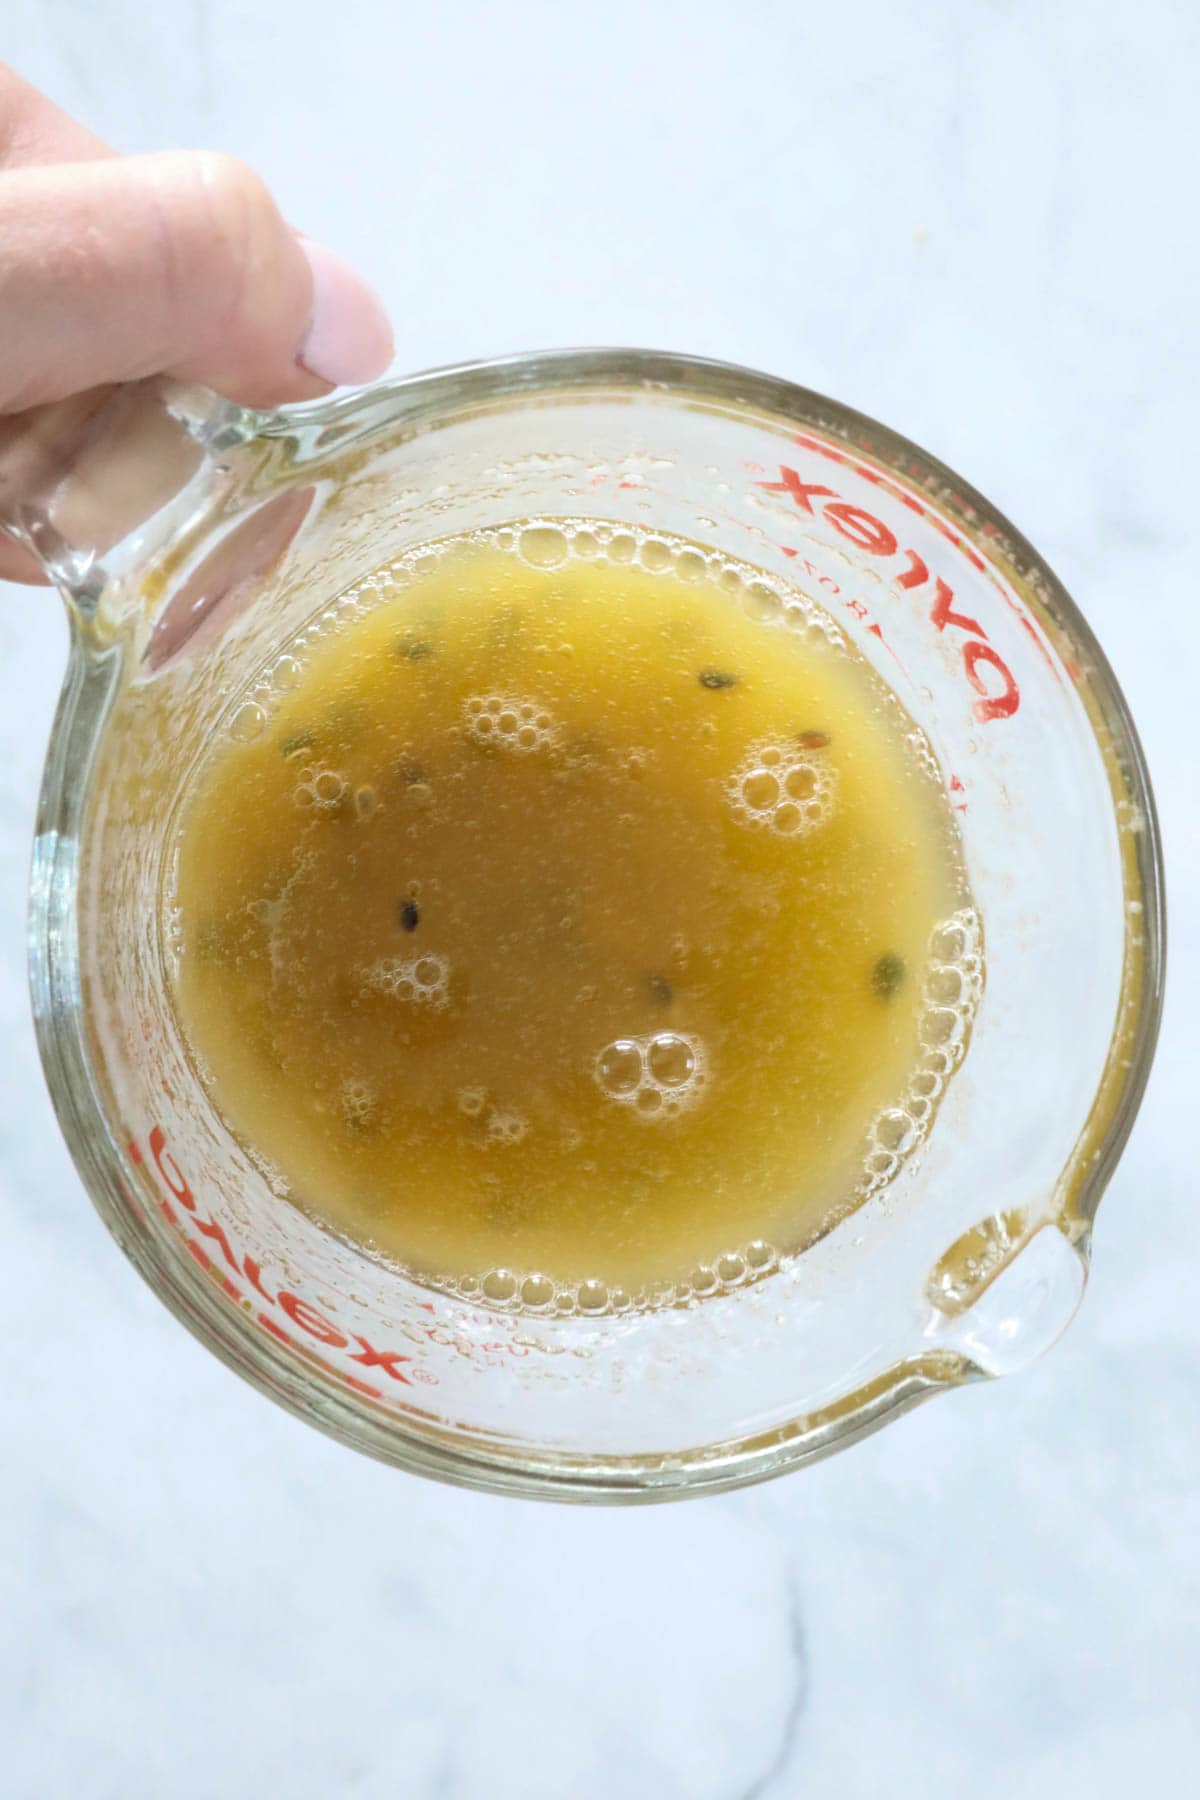
Carefully pour the passionfruit jelly over the top of the set cheesecake.

Step 6 – Chill Then Serve
Return the cheesecake to the fridge and chill for at least 4 hours (preferably overnight).
Expert Tips
- Baking tin – a round springform tin is needed for this recipe. This allows for easy removal of the jelly cheesecake once set. Grease and line it with baking paper before using.
- Cream cheese – have your cream cheese at room temperature to ensure the smoothest cheesecake texture.
- To dissolve the gelatine – place boiling water into a small bowl. Sprinkle over the gelatine powder and whisk quickly with a fork to dissolve. Set aside to cool slightly.
- Chill for a minimum of 4 hours (or overnight) prior to serving – to ensure the cheesecake is fully set and will slice neatly.
- Storage – wrap well and store the cheesecake in the fridge for up to 3 days.
- Freezing – I do not recommend freezing this cheesecake.
FAQs
Allow the cheesecake to firm and set in the fridge for at least 4 hours (preferably overnight). Touch the top of the cheesecake lightly. If it feels firm to the touch, and springs back then the cheesecake is properly set.
Make sure all your ingredients are at room temperature, particularly the cream cheese, to avoid a lumpy cheesecake filling.
No! There is no need to bake the crust of a no-bake cheesecake like this one!
For more delicious cheesecake recipes, check out these other popular recipes:
WANT EVEN MORE DELICIOUS RECIPES? Subscribe to my newsletter or follow along on Facebook or Instagram. And if you love baking, then please come and join my Facebook cooking club group or subscribe to my YouTube channel.
Passionfruit Cheesecake
A simple and delicious no-bake Passionfruit Cheesecake with a crunchy biscuit base, a sweet and creamy filling and a passionfruit jelly topping.
Print Pin RateServings: 16 serves
Calories: 352kcal
Ingredients
For The Passionfruit Jelly Layer
Prevent your screen from going dark
Instructions
Grease and line a 23cm round springform tin with baking paper and set aside.
- Crush the biscuits in a food processor and place into a separate bowl. Add the melted butter and mix until well combined.If using a Thermomix: Place the butter into the Thermomix bowl and melt for 2 minutes, 80 degrees, Speed 2. Add the biscuits and mix for 10 seconds, Speed 8.
Firmly press the mixture into the bottom of the prepared tin and then place it into the fridge.
Dissolve the gelatine powder in the boiling water (see notes). Set aside.
- Use hand-held beaters or a stand mixer to beat the cream cheese and caster sugar until smooth and creamy. If using a Thermomix: Mix the cream cheese and caster sugar for 30 seconds, Speed 5. Scrape down the sides with a spatula and repeat until smooth and creamy.
- Add the dissolved gelatine and beat through. If using a Thermomix: Add the cooled, dissolved gelatine to the mix and mix for 30 seconds on Speed 5.
- Add the cream and lemon juice and beat for 2 minutes or until slightly thickened. Stir through the passionfruit pulp.If using a Thermomix: Add the cream and lemon juice and mix for 2 minutes, Speed 3 or until thickened. Add the passionfruit pulp and mix for 10 seconds, REVERSE, Speed 2, or until combined.
Pour the mixture over the prepared base and place into the fridge for 1-2 hours or until set.
To make the passionfruit jelly layer, mix the extra can of passionfruit pulp through the dissolved gelatine and gently pour over the top of the set cheesecake.
Return to the fridge for 4 hours or until set.
Notes
- Baking tin – a round springform tin is needed for this recipe. This allows for easy removal of the jelly cheesecake once set. Grease and line it with baking paper before using.
- Cream cheese – have your cream cheese at room temperature to ensure the smoothest cheesecake texture.
- To dissolve the gelatine – place boiling water into a small bowl. Sprinkle over the gelatine powder and whisk quickly with a fork to dissolve. Set aside to cool slightly.
- Chill for a minimum of 4 hours (or overnight) prior to serving – to ensure the cheesecake is fully set and will slice neatly.
- Storage – place in an airtight container and store cheesecake in the fridge for up to 3 days.
- Freezing – I do not recommend freezing this cheesecake.
Nutrition
Calories: 352kcal | Carbohydrates: 22g | Protein: 5g | Fat: 28g | Saturated Fat: 16g | Polyunsaturated Fat: 2g | Monounsaturated Fat: 7g | Trans Fat: 0.3g | Cholesterol: 70mg | Sodium: 217mg | Potassium: 150mg | Fiber: 2g | Sugar: 12g | Vitamin A: 1176IU | Vitamin C: 7mg | Calcium: 50mg | Iron: 1mg
Source link